Coreldraw(CDR)打造黄金立体字实例教程
软件云 人气:0
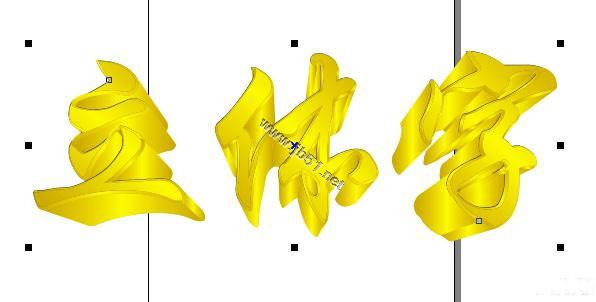
先来看看最终的效果图: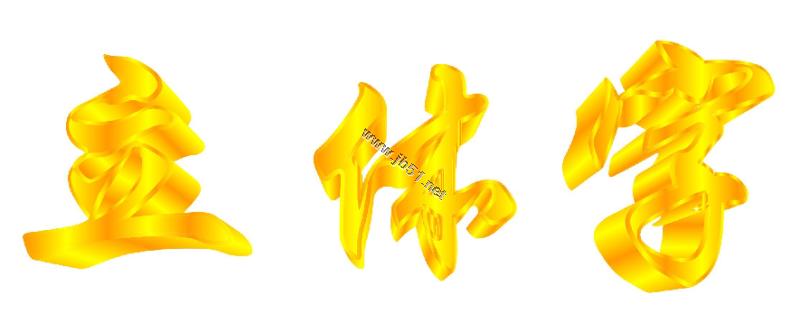

6、折分文字。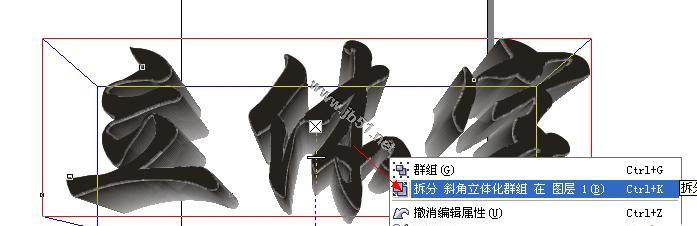
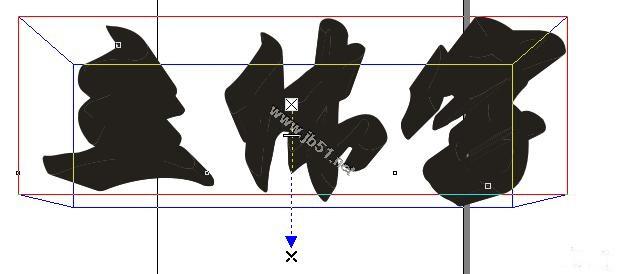
1、在cd里新建文件。2、输入文字,调节所需文字大小及字体。3、选择交互式立体化工具:
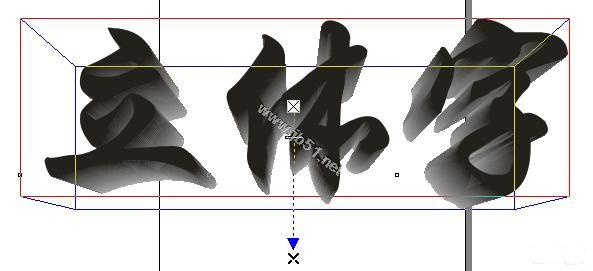
4、选择颜色工具,为了更直观的表现立体效果。
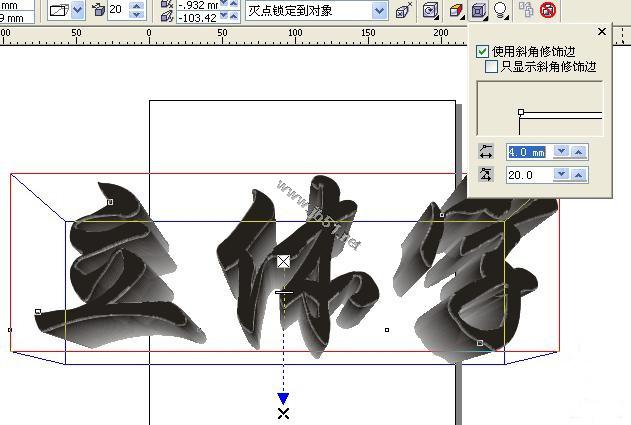
5、选择斜角修饰边工具。
6、折分文字。
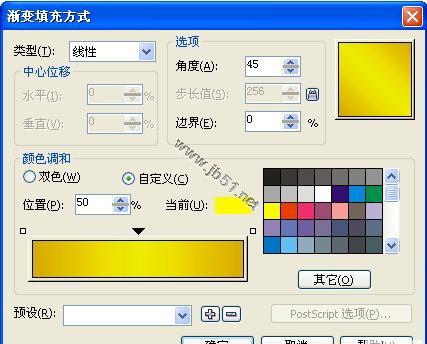
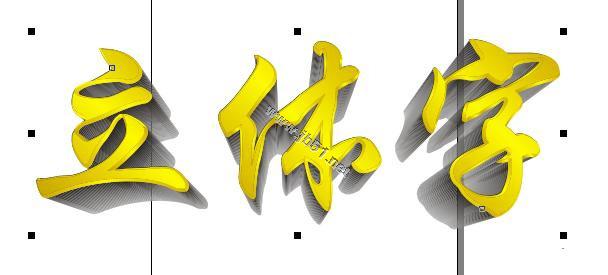
7、填色。分层使用填充工具里渐变填充
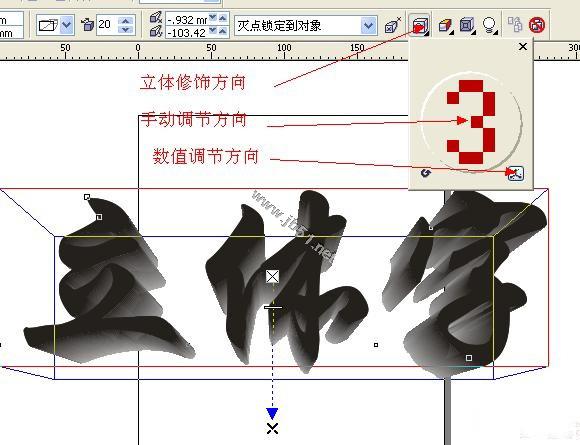
此时可以加些我们前几天学的星星教程中的星光,会更闪亮哦8、完成 9、若需改变文字方向及角度。需在第5步之后使用立体修饰方向
加载全部内容