Android滑动组件悬浮固定 Android滑动组件悬浮固定在顶部效果
ganshenml 人气:0想了解Android滑动组件悬浮固定在顶部效果的相关内容吗,ganshenml在本文为您仔细讲解Android滑动组件悬浮固定的相关知识和一些Code实例,欢迎阅读和指正,我们先划重点:Android滑动组件悬浮固定,Android滑动组件悬浮,Android悬浮固定在顶部,下面大家一起来学习吧。
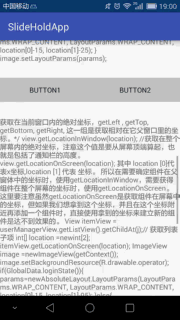
要想实现的效果是如下:
场景:有些时候是内容中间的组件当滑动至顶部的时候固定显示在顶部。
实现的思路:
1.目标组件(button)有两套,放在顶部和内容中间;
2.当内容中间的组件滑动至顶部栏位置时控制显示/隐藏顶部和中间的组件(涉及到组件获取在屏幕的位置知识点);
activity代码:
public class MainActivity extends AppCompatActivity implements ObservableScrollView.ScrollViewListener {
 private ObservableScrollView scrollView;
 private Button topBtn1, topBtn2, middleBtn1, middleBtn2;
 private View topPanel, middlePanel;
 private int topHeight;

 @Override
 protected void onCreate(Bundle savedInstanceState) {
  super.onCreate(savedInstanceState);
  setContentView(R.layout.activity_main);
  initViews();
  initListeners();

 }

 @Override
 public void onWindowFocusChanged(boolean hasFocus) {
  super.onWindowFocusChanged(hasFocus);

  Rect frame = new Rect();
  getWindow().getDecorView().getWindowVisibleDisplayFrame(frame);
  int statusBarHeight = frame.top;//状态栏高度

  int titleBarHeight = getWindow().findViewById(Window.ID_ANDROID_CONTENT).getTop();//标题栏高度
  topHeight = titleBarHeight + statusBarHeight;
 }


 private void initViews() {
  scrollView = (ObservableScrollView) findViewById(R.id.scrollView);
  topPanel = findViewById(R.id.topPanel);
  topBtn1 = (Button) topPanel.findViewById(R.id.button1);
  topBtn2 = (Button) topPanel.findViewById(R.id.button2);

  middlePanel = findViewById(R.id.middlePanel);
  middleBtn1 = (Button) middlePanel.findViewById(R.id.button1);
  middleBtn2 = (Button) middlePanel.findViewById(R.id.button2);

 }

 private void initListeners() {
  topBtn1.setOnClickListener(new View.OnClickListener() {
   @Override
   public void onClick(View view) {
    middleBtn1.setBackgroundColor(Color.WHITE);
    topBtn1.setBackgroundColor(Color.WHITE);
   }
  });

  middleBtn1.setOnClickListener(new View.OnClickListener() {
   @Override
   public void onClick(View view) {
    middleBtn1.setBackgroundColor(Color.BLUE);
    topBtn1.setBackgroundColor(Color.BLUE);
   }
  });

  scrollView.setScrollViewListener(this);


 }


 @Override
 public void onScrollChanged(ObservableScrollView scrollView, int x, int y, int oldx, int oldy) {
  int[] location = new int[2];
  middleBtn1.getLocationOnScreen(location);
  int locationY = location[1];
  Log.e("locationY", locationY + " " + "topHeight的值是:" + topHeight);

  if (locationY <= topHeight && (topPanel.getVisibility() == View.GONE || topPanel.getVisibility() == View.INVISIBLE)) {
   topPanel.setVisibility(View.VISIBLE);
  }

  if (locationY > topHeight && topPanel.getVisibility() == View.VISIBLE) {
   topPanel.setVisibility(View.GONE);
  }

 }
}
要点解析:
1.在onWindowFocusChanged()方法中获取屏幕状态栏和标题栏的高度(在onCreate()方法中是获取是0);
2.因为布局中的ScrollView的onScrollChangeListener()方法低版本API不支持——>所以activity实现了自定义ScrollView中的onScrollChanged()接口方法——>在此方法中实现组件的显示/隐藏;
自定义ScrollView的代码:
public class ObservableScrollView extends ScrollView {

 private ScrollViewListener scrollViewListener = null;

 public ObservableScrollView(Context context) {
  super(context);
 }

 public ObservableScrollView(Context context, AttributeSet attrs,
        int defStyle) {
  super(context, attrs, defStyle);
 }

 public ObservableScrollView(Context context, AttributeSet attrs) {
  super(context, attrs);
 }

 public void setScrollViewListener(ScrollViewListener scrollViewListener) {
  this.scrollViewListener = scrollViewListener;
 }

 @Override
 protected void onScrollChanged(int x, int y, int oldx, int oldy) {
  super.onScrollChanged(x, y, oldx, oldy);
  if (scrollViewListener != null) {
   scrollViewListener.onScrollChanged(this, x, y, oldx, oldy);
  }
 }

 public interface ScrollViewListener {

  void onScrollChanged(ObservableScrollView scrollView, int x, int y, int oldx, int oldy);

 }
}
然后是布局文件:
<?xml version="1.0" encoding="utf-8"?>
<FrameLayout xmlns:android="http://schemas.android.com/apk/res/android"
 xmlns:tools="http://schemas.android.com/tools"
 android:id="@+id/activity_main"
 android:layout_width="match_parent"
 android:layout_height="match_parent"
 tools:context="com.example.administrator.slideholdapp.MainActivity">

 <com.example.administrator.slideholdapp.ObservableScrollView
  android:layout_width="match_parent"
  android:layout_height="match_parent"
  android:id="@+id/scrollView">

  <LinearLayout
   android:layout_width="match_parent"
   android:layout_height="wrap_content"
   android:orientation="vertical">

   <TextView
    android:layout_width="match_parent"
    android:layout_height="wrap_content"
    android:layout_marginBottom="30dp"
    android:text="@string/content" />

   <include android:id="@+id/middlePanel" layout="@layout/middle_item_layout"></include>

   <TextView
    android:layout_width="match_parent"
    android:layout_height="wrap_content"
    android:layout_marginTop="30dp"
    android:text="@string/content" />


  </LinearLayout>

 </com.example.administrator.slideholdapp.ObservableScrollView>

 <include android:id="@+id/topPanel" layout="@layout/middle_item_layout" android:visibility="gone"/>
</FrameLayout>
更多关于滑动功能的文章,请点击专题: 《Android滑动功能》
加载全部内容