springboot整合shiro
桐花思雨 人气:0什么是 Shiro
Shiro 是一个强大的简单易用的 Java 安全框架,主要用来更便捷的 认证,授权,加密,会话管理。Shiro 首要的和最重要的目标就是容易使用并且容易理解,通过 Shiro 易于理解的API,您可以快速、轻松地获得任何应用程序——从最小的移动应用程序最大的网络和企业应用程序
Shiro 架构
Shiro 架构图
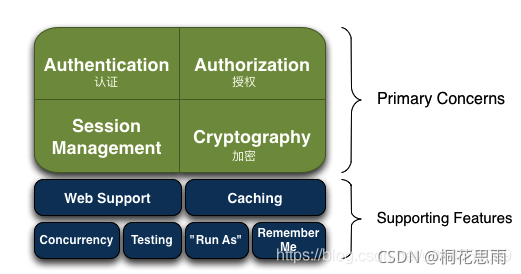
Authentication:身份认证/登录Authorization:验证权限,即,验证某个人是否有做某件事的权限Session Management:会话管理。管理用户特定的会话,支持web与非webCryptography: 加密,保证数据安全Caching:缓存Remember Me:记住我,即记住登录状态,一次登录后,下次再来的话不用登录了
Shiro 工作原理
Shiro 的架构有三个主要概念:Subject,SecurityManager 和 Realms
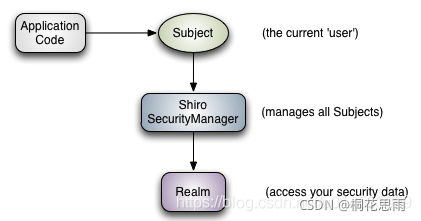
Subject:当前参与应用安全部分的主角。可以是用户,可以试第三方服务,可以是cron任务,或者任何东西。主要指一个正在与当前软件交互的东西。所有Subject都需要SecurityManager,当你与Subject进行交互,这些交互行为实际上被转换为与SecurityManager的交互SecurityManager:安全管理器,Shiro架构的核心,它就像Shiro内部所有原件的保护伞。然而一旦配置了SecurityManager,SecurityManager就用到的比较少,开发者大部分时间都花在Subject上面。当你与Subject进行交互的时候,实际上是SecurityManager在 背后帮你举起Subject来做一些安全操作Realms:Realms作为Shiro和你的应用的连接桥,当需要与安全数据交互的时候,像用户账户,或者访问控制,Shiro就从一个或多个Realms中查找。Shiro提供了一些可以直接使用的Realms,如果默认的Realms不能满足你的需求,你也可以定制自己的Realms
Shiro 详细架构图
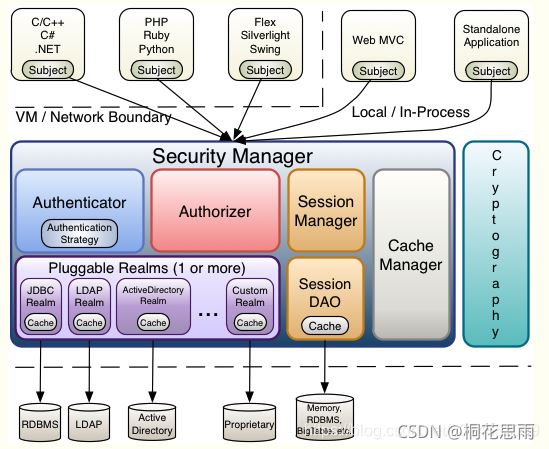
Subject:与应用交互的主体,例如用户,第三方应用等SecurityManager:shiro的核心,负责整合所有的组件,使他们能够方便快捷完成某项功能。例如:身份验证,权限验证等Authenticator:认证器,负责主体认证的,这是一个扩展点,如果用户觉得Shiro默认的不好,可以自定义实现;其需要认证策略(Authentication Strategy),即什么情况下算用户认证通过了。Authorizer:决定主体是否有权限进行相应的操作;即控制着用户能访问应用中的哪些功能SessionManager:会话管理。CacheManager:缓存管理器。创建和管理缓存,为authentication,authorization和sessionmanagement提供缓存数据,避免直接访问数据库,提高效率Cryptography;密码模块,提供加密组件Realms:可以有1个或多个Realm,可以认为是安全实体数据源,即用于获取安全实体的;可以是JDBC实现,也可以是LDAP实现,或者内存实现等等;由用户提供;注意:Shiro不知道你的用户/权限存储在哪及以何种格式存储;所以我们一般在应用中都需要实现自己的Realm
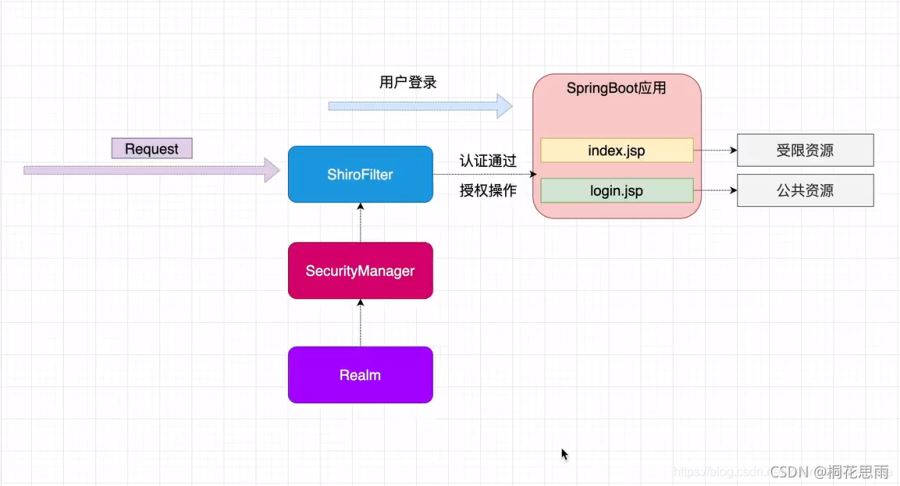
springboot 整合 shiro
springboot 整合 shiro 思路
项目搭建
主要依赖
<!--thymeleaf 模板引擎-->
<dependency>
	<groupId>org.springframework.boot</groupId>
	<artifactId>spring-boot-starter-thymeleaf</artifactId>
</dependency>
<!--shiro-->
<dependency>
	<groupId>org.apache.shiro</groupId>
	<artifactId>shiro-spring-boot-starter</artifactId>
	<version>1.4.0</version>
</dependency>
<!-- thymeleaf 集成 shiro -->
<dependency>
	<groupId>com.github.theborakompanioni</groupId>
    <artifactId>thymeleaf-extras-shiro</artifactId>
	<version>2.0.0</version>
</dependency>
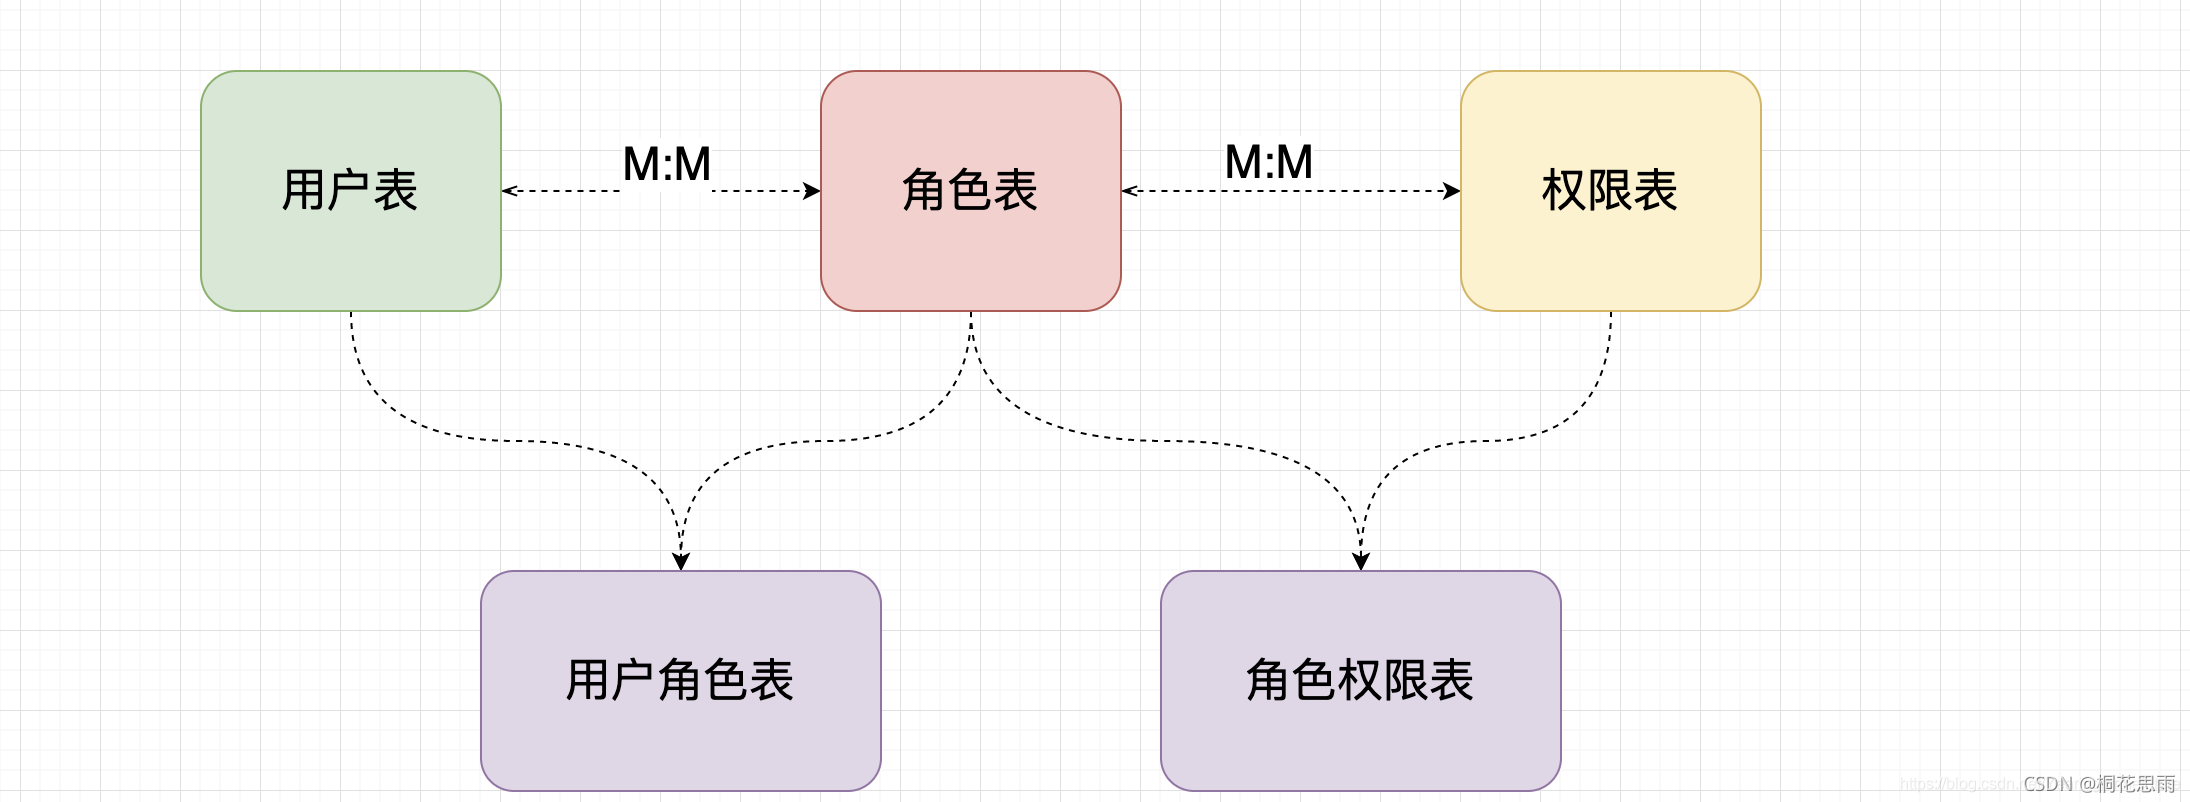
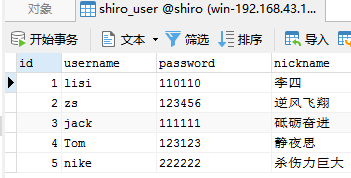
数据库表设计
CREATE TABLE `shiro_user` (
  `id` int(11) NOT NULL AUTO_INCREMENT,
  `username` varchar(255) NOT NULL,
  `password` varchar(255) NOT NULL,
  `nickname` varchar(255) NOT NULL,
  PRIMARY KEY (`id`),
  UNIQUE KEY `index_username` (`username`) USING BTREE
) ENGINE=InnoDB AUTO_INCREMENT=6 DEFAULT CHARSET=utf8mb4;

INSERT INTO `shiro_user` VALUES (1, 'lisi', '110110', '李四');
INSERT INTO `shiro_user` VALUES (2, 'zs', '123456', '逆风飞翔');
INSERT INTO `shiro_user` VALUES (3, 'jack', '111111', '砥砺奋进');
INSERT INTO `shiro_user` VALUES (4, 'Tom', '123123', '静夜思');
INSERT INTO `shiro_user` VALUES (5, 'nike', '222222', '杀伤力巨大');

CREATE TABLE `shiro_user_role` (
  `id` int(11) NOT NULL AUTO_INCREMENT,
  `user_id` int(11) NOT NULL,
  `role_id` int(11) NOT NULL,
  PRIMARY KEY (`id`)
) ENGINE=InnoDB AUTO_INCREMENT=5 DEFAULT CHARSET=utf8mb4;

INSERT INTO `shiro_user_role` VALUES (1, 1, 1);
INSERT INTO `shiro_user_role` VALUES (2, 2, 3);
INSERT INTO `shiro_user_role` VALUES (3, 3, 3);
INSERT INTO `shiro_user_role` VALUES (4, 4, 2);

CREATE TABLE `shiro_role` (
  `id` int(11) NOT NULL AUTO_INCREMENT,
  `role_code` varchar(255) NOT NULL,
  `role_name` varchar(255) NOT NULL,
  PRIMARY KEY (`id`)
) ENGINE=InnoDB AUTO_INCREMENT=5 DEFAULT CHARSET=utf8mb4;

INSERT INTO `shiro_role` VALUES (1, '1', '管理员');
INSERT INTO `shiro_role` VALUES (2, '2', '普通一级用户');
INSERT INTO `shiro_role` VALUES (3, '3', '普通二级用户');
INSERT INTO `shiro_role` VALUES (4, '4', '普通三级用户');

CREATE TABLE `shiro_auth_role` (
  `id` int(11) NOT NULL AUTO_INCREMENT,
  `auth_id` int(11) NOT NULL,
  `role_id` int(11) NOT NULL,
  PRIMARY KEY (`id`)
) ENGINE=InnoDB AUTO_INCREMENT=10 DEFAULT CHARSET=utf8mb4;

INSERT INTO `shiro_auth_role` VALUES (1, 1, 1);
INSERT INTO `shiro_auth_role` VALUES (2, 2, 1);
INSERT INTO `shiro_auth_role` VALUES (3, 3, 1);
INSERT INTO `shiro_auth_role` VALUES (4, 4, 1);
INSERT INTO `shiro_auth_role` VALUES (5, 3, 2);
INSERT INTO `shiro_auth_role` VALUES (6, 4, 2);
INSERT INTO `shiro_auth_role` VALUES (7, 4, 3);
INSERT INTO `shiro_auth_role` VALUES (8, 4, 4);
INSERT INTO `shiro_auth_role` VALUES (9, 1, 3);

CREATE TABLE `shiro_auth` (
  `id` int(11) NOT NULL AUTO_INCREMENT,
  `auth_code` varchar(255) NOT NULL,
  `auth_name` varchar(255) NOT NULL,
  `parent_id` int(11) NOT NULL,
  PRIMARY KEY (`id`)
) ENGINE=InnoDB AUTO_INCREMENT=5 DEFAULT CHARSET=utf8mb4;

INSERT INTO `shiro_auth` VALUES (1, 'user:add', '添加', 1);
INSERT INTO `shiro_auth` VALUES (2, 'user:delete', '删除', 2);
INSERT INTO `shiro_auth` VALUES (3, 'user:update', '更新', 3);
INSERT INTO `shiro_auth` VALUES (4, 'user:list', '查看', 4);
实体类
public class User implements Serializable {
    private Integer id;

    @NotBlank(message = "账号不能为空")
    private String username;

    @NotEmpty(message = "密码不能为空")
    private String password;

    private String nickname;

	// set/get方法省略
}

public class Role {
    private Integer id;

    private String roleCode;

    private String roleName;

	// set/get方法省略
}

public class Auth {
    private Integer id;

    private String authCode;

    private String authName;

    private Integer parentId;

	// set/get方法省略
}
自定义 Realm
realm 是 shiro 进行登录认证,权限,角色校验的关键,我们需要重写里面的方法
@Component
@Slf4j
public class UserRealm extends AuthorizingRealm {

    @Autowired
    private UserService userService;

    // 授权,权限操作
    @Override
    protected AuthorizationInfo doGetAuthorizationInfo(@NotNull PrincipalCollection principals) {
        log.info("------进入授权操作了------");
        User user = (User) principals.getPrimaryPrincipal();
        SimpleAuthorizationInfo info = new SimpleAuthorizationInfo();
        // 通过账号来查询相应的角色,权限数据
        List<AuthAndRoleVO> authAndRoleVOS = userService.selectAuthAndRole(user.getUsername());
        authAndRoleVOS.forEach(item -> {
            log.info("查询到的权限,角色:" + item.toString());
            String roleName = item.getRoleName();
            String authCode = item.getAuthCode();
            info.addStringPermission(authCode);
            info.addRole(roleName);
        });
        return info;
    }

    // 认证操作
    @Override
    protected AuthenticationInfo doGetAuthenticationInfo(AuthenticationToken token) throws AuthenticationException {
        log.info("------进入认证操作了------");
        // 拿到UsernamePasswordToken,它里面有用户名,密码数据
        UsernamePasswordToken usernamePasswordToken = (UsernamePasswordToken) token;
        // 查询数据库
        User user = userService.selectOne(usernamePasswordToken.getUsername(), String.valueOf(usernamePasswordToken.getPassword()));
        if (user == null) {
            return null;
        }
        return new SimpleAuthenticationInfo(user, token.getCredentials(), getName());
    }
}
- 这里
ORM持久层不再赘述,用mybatis或jpa等都可以 doGetAuthorizationInfo(): 权限认证。即登录过后,每个用户的身份不一样,对应的所能看的页面也不一样,也就是拥有的权限也不一样doGetAuthenticationInfo():身份认证。即登录通过账号和密码验证登陆人的身份信息
shiro 的配置类
@Configuration
public class ShiroConfig {

    /**
     * 安全管理器
     */
    @Bean
    public DefaultWebSecurityManager getDefaultWebSecurityManager(UserRealm userRealm) {
        DefaultWebSecurityManager defaultWebSecurityManager = new DefaultWebSecurityManager();
        defaultWebSecurityManager.setRealm(userRealm);
        return defaultWebSecurityManager;
    }

    /**
     * thymeleaf模板引擎中使用shiro标签时,要用到
     */
    @Bean
    public ShiroDialect getShiroDialect() {
        return new ShiroDialect();
    }

    @Bean
    public ShiroFilterFactoryBean shiroFilter(DefaultWebSecurityManager defaultWebSecurityManager) {
        ShiroFilterFactoryBean shiroFilterFactoryBean = new ShiroFilterFactoryBean();
        shiroFilterFactoryBean.setSecurityManager(defaultWebSecurityManager);
        // 设置登录页面url
        shiroFilterFactoryBean.setLoginUrl("/user/login");
        shiroFilterFactoryBean.setSuccessUrl("/user/index");
        shiroFilterFactoryBean.setUnauthorizedUrl("/user/unauthorized");

        // 注意此处使用的是LinkedHashMap是有顺序的,shiro会按从上到下的顺序匹配验证,匹配了就不再继续验证
        Map<String, String> filterChainDefinitionMap = new LinkedHashMap<>();
		// 静态资源放行
        filterChainDefinitionMap.put("/layer/**", "anon");
        filterChainDefinitionMap.put("/img/**", "anon");
        filterChainDefinitionMap.put("/jquery/**", "anon");
        // add.html页面放行
        filterChainDefinitionMap.put("/user/add", "anon");
        // update.html必须认证
        filterChainDefinitionMap.put("/user/update", "authc");
        // index.html必须认证
        filterChainDefinitionMap.put("/user/index", "authc");
        // 设置授权,只有user:add权限的才能请求/user/add这个url
        filterChainDefinitionMap.put("/user/add", "perms[user:add]");
        filterChainDefinitionMap.put("/user/update", "perms[user:update]");

        shiroFilterFactoryBean.setFilterChainDefinitionMap(filterChainDefinitionMap);
        return shiroFilterFactoryBean;
    }
}
ShiroFilterFactoryBean 过滤器链配置中的 url 匹配规则
- ?:匹配一个字符,如 /admin?,将匹配 /admin1、/admin2,但不匹配 /admin
- *:匹配零个或多个字符串,如 /admin* ,将匹配 /admin、/admin123,但不匹配 /admin/1
- **:匹配路径中的零个或多个路径,如 /admin/**,将匹配 /admin/a、/admin/a/b
ShiroFilterFactoryBean 过滤器
- anon:匿名过滤器,无需认证就可以访问。例:/statics/**= anon 表示 statics 目录下所有资源都能访问
- authc:必须认证了才能访问,否则跳转到登录页面。例:/unauthor.jsp= authc 如果用户没有登录就访问 unauthor.jsp,则直接跳转到登录页面
- user:必须通过记住我功能通过或认证通过才能访问
- perms:拥有对某个资源的权限才能访问。例:/statics/** = perms["user:add:*,user:modify:*"] 表示访问 statics 目录下的资源时只有新增和修改的权限
- roles:拥有某个角色权限才能访问。例:/welcom.jsp = roles[admin] 表示访问 welcom.jsp 页面时会检查是否拥有 admin 角色
ShiroFilterFactoryBean 过滤器分类
- 认证过滤器:anon、authcBasic、auchc、user、logout
- 授权过滤器:perms、roles、ssl、rest、port
前端页面
登录页面 login.html
<!DOCTYPE html>
<html lang="en" xmlns:th="http://www.thymeleaf.org">
<head>
    <meta charset="UTF-8">
    <title>登录</title>
    <link rel="shortcut icon" type="image/x-icon" th:href="@{/img/favicon.ico}" rel="external nofollow"  rel="external nofollow"  rel="external nofollow"  rel="external nofollow"  rel="external nofollow" />
</head>
<body>
<form action="" method="post">
    <p>
        账号:
        <label><input type="text" class="username" name="username"></label>
    </p>
    <p>
        密码:
        <label><input type="text" class="password" name="password"></label>
    </p>
    <p>
        <label><input id="checkbox1" type="checkbox" name="rememberMe"></label>记住我
    </p>
    <p><button type="button" class="loginBtn">登录</button></p>
</form>
</body>
<script type="text/javascript" th:src="@{/jquery/jquery-3.3.1.min.js}"></script>
<script type="text/javascript" th:src="@{/layer/layer.js}"></script><!--layui的弹出层-->
<script type="text/javascript">
    $(document).ready(function () {
        $('.loginBtn').on('click', function () { // 登录按钮
            const username = $('.username').val();
            const password = $('.password').val();
            $.ajax({// 用户登录
                type: 'post',
                url: '/user/doLogin',
                dataType: 'json',
                data: ({
                    'username': username,
                    'password': password
                }),
                success: function (resp) {
                    console.log(resp);
                    if (resp.code !== 200) {
                        layer.msg(resp.message, function () {// layui的弹窗
                        });
                    } else if (resp.code === 200) {
                        window.location.href = 'http://127.0.0.1:8080'+ resp.action;
                    }
                },
                error: function () {// 此处添加错误处理
                    layer.open({
                        title: '提示信息',
                        content: '后台访问错误,请联系管理员',
                        skin: 'layui-layer-molv',
                        icon: 0
                    });
                }
            });
        });
    });
</script>
</html>
首页页面 index.html
<!DOCTYPE html>
<html lang="en" xmlns:th="http://www.thymeleaf.org">
<head>
    <meta charset="UTF-8">
    <title>首页</title>
    <link rel="shortcut icon" type="image/x-icon" th:href="@{/img/favicon.ico}" rel="external nofollow"  rel="external nofollow"  rel="external nofollow"  rel="external nofollow"  rel="external nofollow" />
</head>
<body>
    <h1>首页</h1>

    <a th:href="@{/user/add}" rel="external nofollow" >add</a> | <a th:href="@{/user/update}" rel="external nofollow" >update</a><br>

    <a th:href="@{/user/logout}" rel="external nofollow"  rel="external nofollow"  rel="external nofollow" >退出登录</a>
</body>
</html>
添加页面 add.html
<!DOCTYPE html>
<html lang="en" xmlns:th="http://www.thymeleaf.org">
<head>
    <meta charset="UTF-8">
    <title>add</title>
    <link rel="shortcut icon" type="image/x-icon" th:href="@{/img/favicon.ico}" rel="external nofollow"  rel="external nofollow"  rel="external nofollow"  rel="external nofollow"  rel="external nofollow" />
</head>
<body>
    <h1>add</h1><br>

    <a th:href="@{/user/logout}" rel="external nofollow"  rel="external nofollow"  rel="external nofollow" >退出登录</a>
</body>
</html>
更新页面 update.html
<!DOCTYPE html>
<html lang="en" xmlns:th="http://www.thymeleaf.org">
<head>
    <meta charset="UTF-8">
    <title>update</title>
    <link rel="shortcut icon" type="image/x-icon" th:href="@{/img/favicon.ico}" rel="external nofollow"  rel="external nofollow"  rel="external nofollow"  rel="external nofollow"  rel="external nofollow" />
</head>
<body>
    <h1>update</h1><br>

    <a th:href="@{/user/logout}" rel="external nofollow"  rel="external nofollow"  rel="external nofollow" >退出登录</a>
</body>
</html>
未授权页面 unauthorized.html
<!DOCTYPE html>
<html lang="en" xmlns:th="http://www.thymeleaf.org" xmlns="http://www.w3.org/1999/html">
<head>
    <meta charset="UTF-8">
    <title>未授权</title>
    <link rel="shortcut icon" type="image/x-icon" th:href="@{/img/favicon.ico}" rel="external nofollow"  rel="external nofollow"  rel="external nofollow"  rel="external nofollow"  rel="external nofollow" />
</head>
<body>
    <p1>未授权,无法访问此页面</p1></br>
    <a th:href="@{/user/index}" rel="external nofollow" >回到上一页</a>
</body>
</html>
controller 控制器
鉴于文章篇幅,这里只展示主要的逻辑代码
@Controller
@RequestMapping(path = "/user")
@Slf4j
public class UserController {

	@GetMapping(path = "/login")
    public String login() {
        return "login";
    }

    @GetMapping(path = "/index")
    public String index() {
        return "index";
    }

    @GetMapping(path = "/add")
    public String add() {
        return "add";
    }

    @GetMapping(path = "/update")
    public String update() {
        return "update";
    }

	// 未授权页面
    @GetMapping(path = "/unauthorized")
    public String unauthorized() {
        return "unauthorized";
    }

    // 用户登录
    @PostMapping(path = "/doLogin")
    @ResponseBody
    public ResultMap doLogin(@NotNull @Valid User user, @NotNull BindingResult bindingResult) {
        // ------参数校验------
        if (bindingResult.hasErrors()) {
            String message = Objects.requireNonNull(bindingResult.getFieldError()).getDefaultMessage();
            log.info("校验的message信息为:" + message);
            return new ResultMap().fail().message(message);
        }
        // 将用户名,密码交给shiro
        UsernamePasswordToken token = new UsernamePasswordToken(user.getUsername(), user.getPassword());
        String msg;
        try {
            // shiro帮我们匹配密码什么的,我们只需要把东西传给它,它会根据我们在UserRealm里认证方法设置的来验证
            Subject subject = SecurityUtils.getSubject();
            subject.login(token);
            return new ResultMap().success().action("/user/index");
        } catch (AuthenticationException e) {
            if (e instanceof IncorrectCredentialsException) {
                msg = "密码错误";
            } else if (e instanceof LockedAccountException) {
                msg = "用户被禁用";
            } else if (e instanceof UnknownAccountException) {
                msg = "用户不存在";
            } else {
                msg = "用户认证失败";
            }
        }
        return new ResultMap().error().message(msg);
    }

    // 用户退出登录
    @GetMapping(path = "/logout")
    public String logout() {
        SecurityUtils.getSubject().logout();
        return "login";
    }
}
shiro 注解
在 contrller 的这些方法中,也可以使用 shiro 提供的一些注解来校验用户,认证用户。不过个人认为使用这些注解有点麻烦(因为有些注解会抛出异常,然后再 controller 层还要捕获异常),所以我在 ShiroConfig 配置类中进行了配置
- @RequiresAuthentication:表示当前 Subject 已经通过 login 进行了身份验证;即 Subject.isAuthenticated() 返回 true
- @RequiresUser:表示当前 Subject 已经通过身份验证或者通过记住我进行登录的
- @RequiresGuest:表示当前 Subject 没有身份验证或通过记住我登录过,即是游客身份
- @RequiresRoles(value={“admin”, “user”}, logical= Logical.AND):表示当前 Subject 需要角色 admin 和 user。如果当前 Subject 不同时 拥有所有指定角色,则方法不会执行还会抛出 AuthorizationException 异常
- @RequiresPermissions(value={“user:a”, “user:b”}, logical= Logical.OR):表示当前 Subject 需要权限 user:a 或 user:b。如果当前 Subject 不具有这样的权限,则方法不会被执行
测试
启动项目,首先进入登录页面 login.html,如下
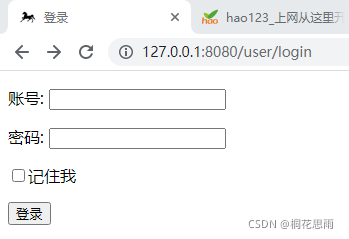
我们分别以数据库中的 {jack,111111} 和 {Tom,123123} 账号与密码进行测试
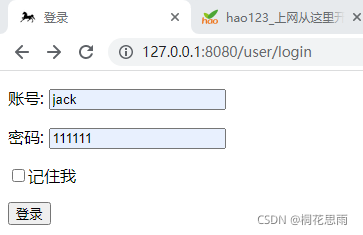
测试一
首先使用 {jack,111111} 来进行登录,如下
进入首页页面,如下
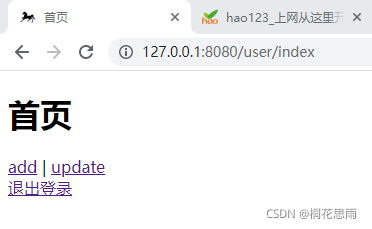
我们在接着查看控制台日志,如下

我们看到首页页面有两个超链接页面,以用户 jack 的身份分别进入两个页面。首先进入 add.html 页面,如下
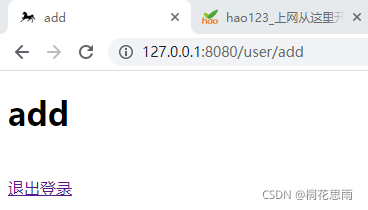
说明用户 jack 拥有访问 add.html 的权限,此时在查看控制台日志,如下
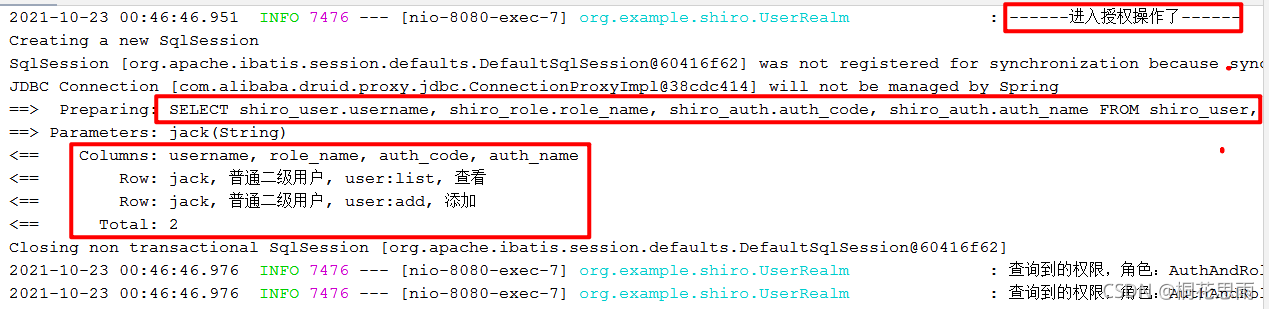
注意查看用户 jack 的数据,他的权限只有 user/add 和 user/list,是没有 user/update 权限的,也就是没有权限访问 update.html 页面的。可以验证,我们再以用户 jack 的身份进入 update.html 页面,如下
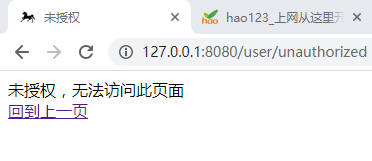
关于测试,到此为止。当然,依然可以使用其他的数据在进行测试
小结
shiro 最为关键的就是 realm 了,继承 AuthorizingRealm,然后重写两个方法
- doGetAuthorizationInfo(): 权限认证。即登录过后,每个用户的身份不一样,对应的所能看的页面也不一样,也就是拥有的权限也不一样
- doGetAuthenticationInfo():身份认证。即登录通过账号和密码验证登陆人的身份信息
在 controller 中的核心登录操作,就是将前端页面用户的登录数据(如账号,密码)交给 UsernamePasswordToken,然后使用当前的 Subject 对象调用 login(token) 方法即可,如下
// 将用户名,密码交给shiro
UsernamePasswordToken token = new UsernamePasswordToken(user.getUsername(), user.getPassword());

// shiro帮我们匹配密码什么的,我们只需要把东西传给它,它会根据我们在UserRealm里认证方法设置的来验证
Subject subject = SecurityUtils.getSubject();
subject.login(token);
加载全部内容