plt.savefig()用法及路径
因为简单,所以快乐 人气:0图像有时候比数据更能满足人们的视觉需求
Pytorch中保存图片的方式
pytorch下保存图像有很多种方法,但是这些基本上都是基于图像处理的,将图像的像素指定一定的维度 ,方法如下:
1、tensor直接保存
#!/usr/bin/env python
# _*_ coding:utf-8 _*_
import torch
from torchvision import utils as vutils


def save_image_tensor(input_tensor: torch.Tensor, filename):
    """
    将tensor保存为图片
    :param input_tensor: 要保存的tensor
    :param filename: 保存的文件名
    """
    assert (len(input_tensor.shape) == 4 and input_tensor.shape[0] == 1)
    # 复制一份
    input_tensor = input_tensor.clone().detach()
    # 到cpu
    input_tensor = input_tensor.to(torch.device('cpu'))
    # 反归一化
    # input_tensor = unnormalize(input_tensor)
    vutils.save_image(input_tensor, filename)
2、tensor转cv2保存
#!/usr/bin/env python
# _*_ coding:utf-8 _*_
import torch
import cv2


def save_image_tensor2cv2(input_tensor: torch.Tensor, filename):
    """
    将tensor保存为cv2格式
    :param input_tensor: 要保存的tensor
    :param filename: 保存的文件名
    """
    assert (len(input_tensor.shape) == 4 and input_tensor.shape[0] == 1)
    # 复制一份
    input_tensor = input_tensor.clone().detach()
    # 到cpu
    input_tensor = input_tensor.to(torch.device('cpu'))
    # 反归一化
    # input_tensor = unnormalize(input_tensor)
    # 去掉批次维度
    input_tensor = input_tensor.squeeze()
    # 从[0,1]转化为[0,255],再从CHW转为HWC,最后转为cv2
    input_tensor = input_tensor.mul_(255).add_(0.5).clamp_(0, 255).permute(1, 2, 0).type(torch.uint8).numpy()
    # RGB转BRG
    input_tensor = cv2.cvtColor(input_tensor, cv2.COLOR_RGB2BGR)
    cv2.imwrite(filename, input_tensor)
3、tensor转pillow保存
def save_image_tensor2pillow(input_tensor: torch.Tensor, filename):
    """
    将tensor保存为pillow
    :param input_tensor: 要保存的tensor
    :param filename: 保存的文件名
    """
    assert (len(input_tensor.shape) == 4 and input_tensor.shape[0] == 1)
    # 复制一份
    input_tensor = input_tensor.clone().detach()
    # 到cpu
    input_tensor = input_tensor.to(torch.device('cpu'))
    # 反归一化
    # input_tensor = unnormalize(input_tensor)
    # 去掉批次维度
    input_tensor = input_tensor.squeeze()
    # 从[0,1]转化为[0,255],再从CHW转为HWC,最后转为numpy
    input_tensor = input_tensor.mul_(255).add_(0.5).clamp_(0, 255).permute(1, 2, 0).type(torch.uint8).numpy()
    # 转成pillow
    im = Image.fromarray(input_tensor)
    im.save(filename)
主要是写一些函数来保存图片;
另外,pytorch中有很多可以直接保存图片的语句
如
save_image(fake_images, './img/fake_images-{}.png'.format(epoch + 1))
此语句同样需要转化像素。
那么如果
我只需要打开一个视窗,观察训练过程中图像的变化,我对图像像素保存没有什么需求,只是保存一个视窗,那么我需要的保存图像的函数仅仅是一个
plt.savefig
plt.savefig的用法以及保存的路径,及训练过程中不会被覆盖掉,可以上代码供大家参考
        if epoch % 10== 0:
            plt.title('ber:{:.3f},a: {:.3f},b:{:.3f},snr: {:.3f}'.format(
            error_rate, a, b,M
            ))
            plt.plot(r3)  # 绘制波形

            # save_image(r3, './img/fake_images-{}.png'.format(epoch + 1))
            # print(type(r3))
            # plt.draw()
            plt.draw()
            plt.savefig('./img/pic-{}.png'.format(epoch + 1))
            plt.pause(1)

            plt.close(fig1)
大功告成,可以看看保存后的图片
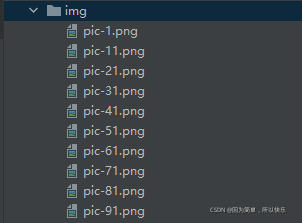
已经都整整齐齐的在我的保存路径下了。
总结
加载全部内容