SpringBoot2 profile
扎哇太枣糕 人气:01 profile功能
1.1 profile的生效规则
为了方便多环境适配,SpringBoot简化了profile功能,具体的使用规则如下: ①在resources文件夹下可以一次创建多个application-xxx.yaml配置文件,分别对应着不同的生产、测试等环境,但是只有命名为application.yaml(或者后缀.properties的文件)文件会默认加载,所以说其他环境的配置文件中的配置信息都不会生效。
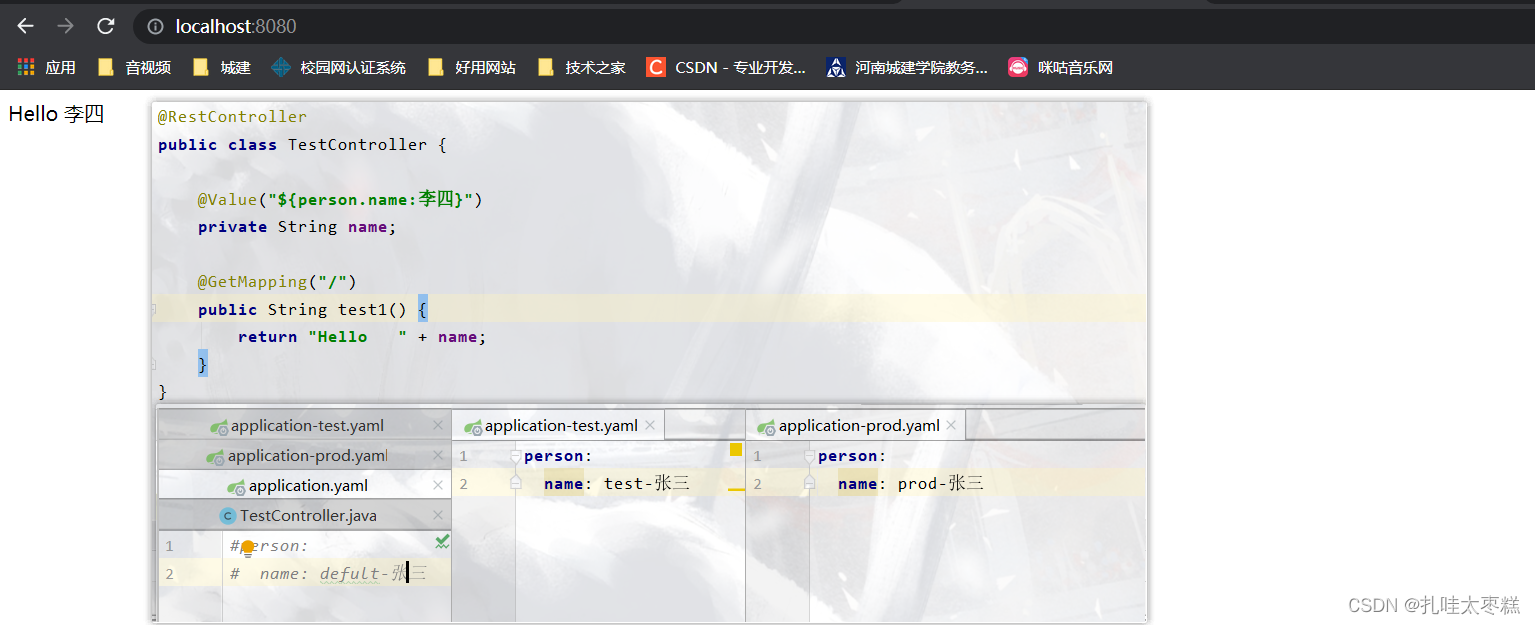
②如果是想切换配置文件环境的话,就可以在默认配置文件中配置
spring:
profiles:
active: test

③当不同配置文件的配置项产生冲突的时候,首先若是其他环境都没有激活的话使用默认配置文件的配置,若是在默认配置文件中激活了其他环境的配置就按激活的配置

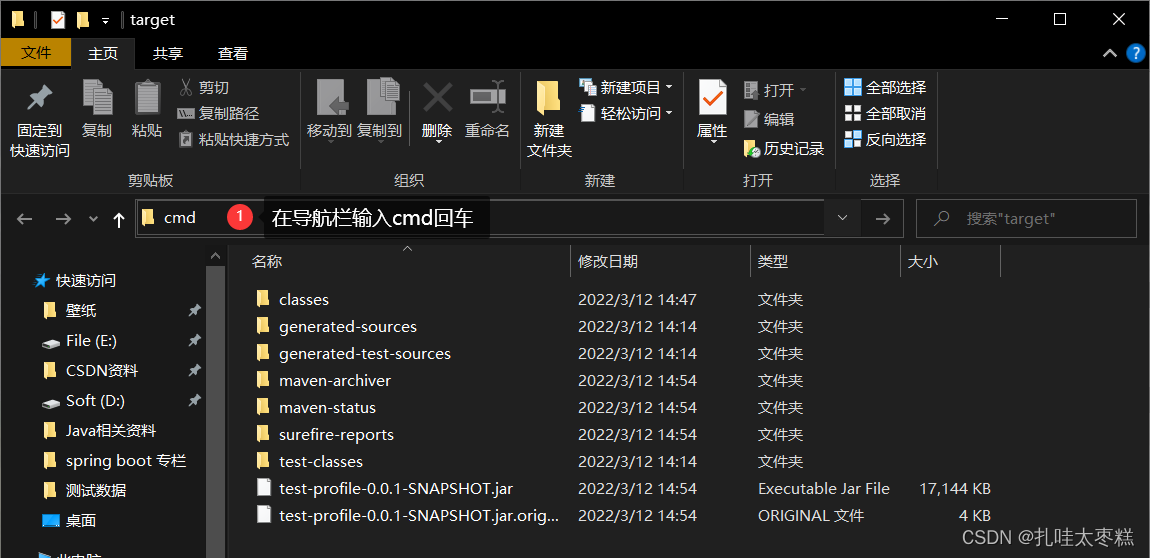
④使用命令行运行jar包期间可以不用重新修改配置文件再次打包,可以通过命令行参数配置进行修改激活的环境。首先需要对项目进行打包并打开jar包的存储位置

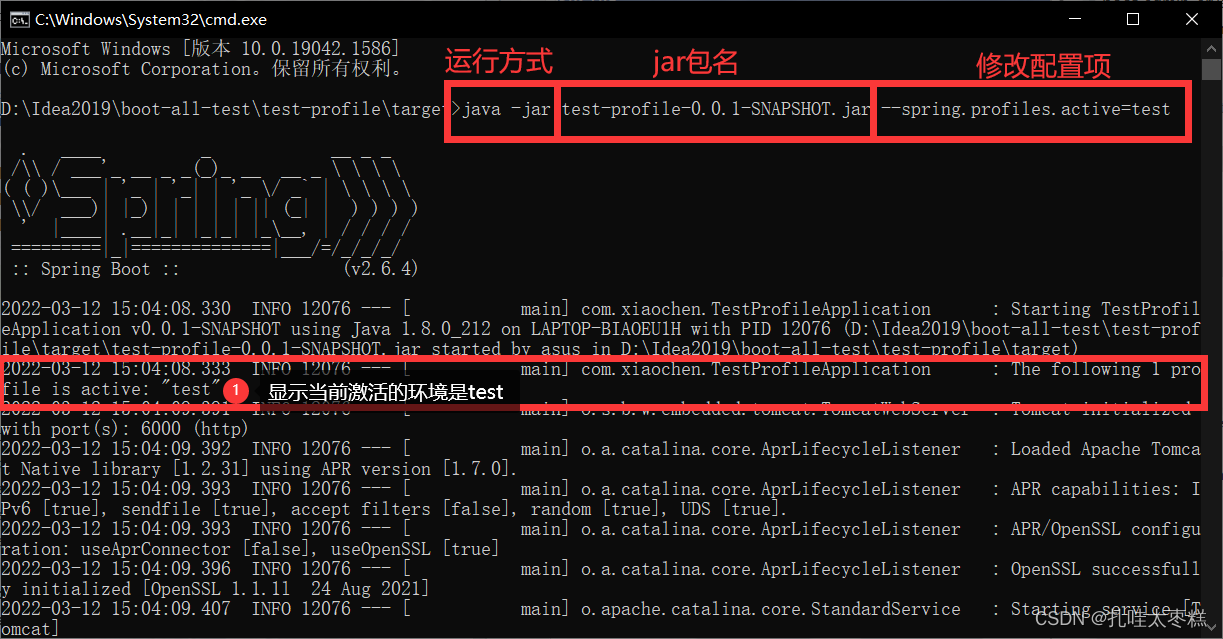
进入dos窗口输入命令修改环境并运行jar包
java -jar test-profile-0.0.1-SNAPSHOT.jar --spring.profiles.active=test
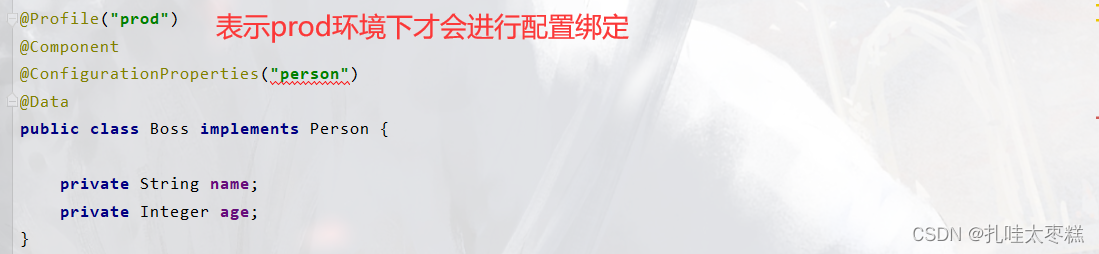
⑤我们该可以使用@Profile(“xxx”)注解标注在类、方法或参数绑定上,表示在指定环境下才会执行该类、方法或者进行配置文件与POJO类的绑定
1.2 外部配置源
常用可以作为外部配置源的有:Java属性文件、YAML文件、环境变量、命令行参数。其中配置文件的默认扫描位置也不只单单一个,以下五个位置都能被SpringBoot默认扫到,加载顺序由高到低但是优先级相反(也就是说配置项相同的时候后面的可以覆盖前面的):(1) classpath 根路径(2) classpath 根路径下config目录(3) 项目jar包同层级(4) 项目jar包同层级的config目录(5) config目录的直接子目录
2 自定义starter
SpringBoot的starter场景启动器想必大家都不陌生,在SpringBoot开发的时候不管进行什么开发只要用到哪种技术第一都是引入它的starter场景启动器,接下来让我们根据SpringBoot中的源码自定义一个场景启动器。
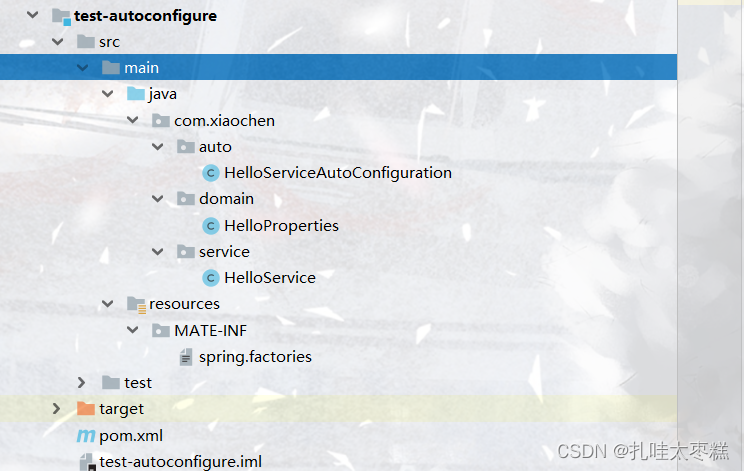
第一步: 使用Spring Initializr创建一个SpringBoot项目作为autoconfiguration,构建项目目录如下:
封装自定义starter业务的HelloService
/**
 * @author : mereign
 * @date : 2022/3/12 - 20:55
 * @desc : service组件,内部定义了方法
 */
public class HelloService {

    @Autowired
    HelloProperties helloProperties;

    public String sayHello(String userName) {
        return helloProperties.getPrefix() + ":" + userName + "》" + helloProperties.getSuffix();
    }
}
封装配置文件属性的HelloProperties
/**
 * @author : mereign
 * @date : 2022/3/12 - 20:57
 * @desc :  配置文件的属性封装,默认自动导入容器中
 */
@ConfigurationProperties("com.xiaochen")
public class HelloProperties {

    private String prefix;
    private String suffix;

    public String getPrefix() {
        return prefix;
    }

    public void setPrefix(String prefix) {
        this.prefix = prefix;
    }

    public String getSuffix() {
        return suffix;
    }

    public void setSuffix(String suffix) {
        this.suffix = suffix;
    }
}
决定是否注册组件的自动配置类HelloServiceAutoConfiguration
/**
 * @author : mereign
 * @date : 2022/3/12 - 21:04
 * @desc : 一个自动配置类,决定是否向容器中注册service组件,以及配置文件绑定
 */

// 表明这是一个配置类
@Configuration
// 配置文件绑定
@EnableConfigurationProperties(HelloProperties.class)
public class HelloServiceAutoConfiguration {

	// 如果容器中没有这个组件就是用下面的方法进行容器的helloService组件注入,如果有的话就用容器中的
	@ConditionalOnMissingBean(HelloService.class)
    // 容器注入组件
    @Bean
    public HelloService helloService() {
        HelloService helloService = new HelloService();
        return helloService;
    }
}
resources文件夹下创建MATE-INF目录下spring.factories文件,这样才能加载到指定的自动配置类
# Auto Configure
org.springframework.boot.autoconfigure.EnableAutoConfiguration=\
com.xiaochen.auto.HelloServiceAutoConfiguration
第二步: 创建一个maven项目作为自定义starter,只需要在它的pom文件中导入autoconfiguration的项目依赖
<dependencies>
    <dependency>
        <groupId>com.xiaochen</groupId>
        <artifactId>test-autoconfigure</artifactId>
        <version>0.0.1-SNAPSHOT</version>
    </dependency>
</dependencies>
第三步: 分别对两个项目模块在生命周期中选择clean和install,将两个模块打成jar包
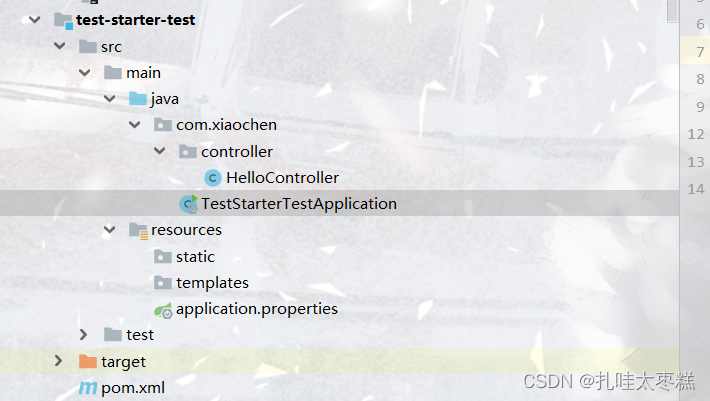
第四步: 创建测试项目,目录结构如下
pom文件中导入自定义的starter
<dependency>
    <groupId>com.xiaochen</groupId>
    <artifactId>test-starter</artifactId>
    <version>1.0-SNAPSHOT</version>
</dependency>
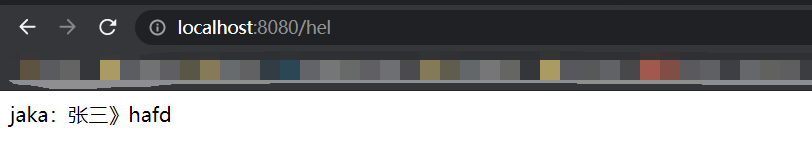
创建一个测试使用的controller
@RestController
public class HelloController {

    @Autowired
    HelloService helloService;

    @GetMapping("/hel")
    public String sayHello() {
        return helloService.sayHello("张三");
    }
}
配置测试项目的配置文件
com.xiaochen.prefix=jaka
com.xiaochen.suffix=hafd
启动测试项目访问controller的请求映射
加载全部内容