vue v-if v-show区别
qb 人气:0高频面试题:vue中的v-show和v-if的区别?
一、v-if
例子:
new Vue({
  el: "#app",
  data() {
    return {
      isShow: false,
    };
  },
  methods: {
    changeStatus() {
      this.isShow = !this.isShow;
    }
  },
  template: `<div><button @click="changeStatus">切换</button><div v-if="isShow">显示</div></div>`
});
1、render
`with(this){
    return _c('div',[_c('button',{on:{"click":changeStatus}},[_v("切换")]),(isShow)?_c('div',[_v("显示")]):_e()])
}`
可以看出,这里通过isShow为三目运算符的判断条件,起始条件下其值为false。
2、vNode

获取到的vNode在v-if条件为false的情况下,获取到的是空的注释节点用来占位,包含属性isComment: true和text: ""。
3、patch
当前例子中,v-if为false,patch的过程中执行到:
else if (isTrue(vnode.isComment)) {
  vnode.elm = nodeOps.createComment(vnode.text);
  insert(parentElm, vnode.elm, refElm);
}
通过nodeOps中的方法创建注释空节点,并插入到父元素中,最终执行结果为:
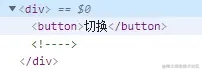
小结
在v-if的情况下,如果起始为false,只会生成空的注释节点用来占位,在需要考虑白屏场景下,使用v-if比较合适。
二、v-show
例子:
new Vue({
  el: "#app",
  data() {
    return {
      isShow: false,
    };
  },
  methods: {
    changeStatus() {
      this.isShow = !this.isShow;
    }
  },
  template: `<div><button @click="changeStatus">切换</button><div v-show="isShow">显示</div></div>`
});
1、render
`with(this){
    return _c('div',[_c('button',{on:{"click":changeStatus}},[_v("切换")]),_c('div',{directives:[{name:"show",rawName:"v-show",value:(isShow),expression:"isShow"}]},[_v("显示")])])
}`
可以看出,这里与v-if不同的是,里面有directives属性。
2、vNode

与v-if不同的是,这里包含用于描述vNode属性的data:
data: {
    directives: {
        expression: "isShow",
        name: "show",
        rawName: "v-show",
        value: false,
    }
}
3、patch
在当前例子中v-show控制的节点会执行到createElm方法中的以下逻辑:
  {
    createChildren(vnode, children, insertedVnodeQueue);
    if (isDef(data)) {
      invokeCreateHooks(vnode, insertedVnodeQueue);
    }
    insert(parentElm, vnode.elm, refElm);
  }
当执行完createChildren(vnode, children, insertedVnodeQueue)后vnode中elm中包含outerHTML: "<div>显示</div>"。
data存在,会执行到invokeCreateHooks:
function invokeCreateHooks (vnode, insertedVnodeQueue) {
    for (let i = 0; i < cbs.create.length; ++i) {
      cbs.create[i](emptyNode, vnode)
    }
    i = vnode.data.hook // Reuse variable
    if (isDef(i)) {
      if (isDef(i.create)) i.create(emptyNode, vnode)
      if (isDef(i.insert)) insertedVnodeQueue.push(vnode)
    }
}
这里对data中的directives进行处理的方法是cbs.create中的updateDirectives:
function updateDirectives (oldVnode: VNodeWithData, vnode: VNodeWithData) {
  if (oldVnode.data.directives || vnode.data.directives) {
    _update(oldVnode, vnode)
  }
}
function _update (oldVnode, vnode) {
  const isCreate = oldVnode === emptyNode
  const isDestroy = vnode === emptyNode
  const oldDirs = normalizeDirectives(oldVnode.data.directives, oldVnode.context)
  const newDirs = normalizeDirectives(vnode.data.directives, vnode.context)
  const dirsWithInsert = []
  const dirsWithPostpatch = []
  let key, oldDir, dir
  for (key in newDirs) {
    oldDir = oldDirs[key]
    dir = newDirs[key]
    if (!oldDir) {
      // new directive, bind
      callHook(dir, 'bind', vnode, oldVnode)
      if (dir.def && dir.def.inserted) {
        dirsWithInsert.push(dir)
      }
    } else {
      // existing directive, update
      dir.oldValue = oldDir.value
      dir.oldArg = oldDir.arg
      callHook(dir, 'update', vnode, oldVnode)
      if (dir.def && dir.def.componentUpdated) {
        dirsWithPostpatch.push(dir)
      }
    }
  }
  // ...
}
这里主要做了两件事,通过normalizeDirectives获取到关于v-show的操作,通过callHook$1(dir, 'bind', vnode, oldVnode)的方式进行属性的绑定
(1)normalizeDirectives
function normalizeDirectives$1 (
  dirs,
  vm
) {
  var res = Object.create(null);
  if (!dirs) {
    // $flow-disable-line
    return res
  }
  var i, dir;
  for (i = 0; i < dirs.length; i++) {
    dir = dirs[i];
    if (!dir.modifiers) {
      // $flow-disable-line
      dir.modifiers = emptyModifiers;
    }
    res[getRawDirName(dir)] = dir;
    dir.def = resolveAsset(vm.$options, 'directives', dir.name, true);
  }
  // $flow-disable-line
  return res
}
/**
 * Resolve an asset.
 * This function is used because child instances need access
 * to assets defined in its ancestor chain.
 */
function resolveAsset (
  options,
  type,
  id,
  warnMissing
) {
  /* istanbul ignore if */
  if (typeof id !== 'string') {
    return
  }
  var assets = options[type];
  // check local registration variations first
  if (hasOwn(assets, id)) { return assets[id] }
  var camelizedId = camelize(id);
  if (hasOwn(assets, camelizedId)) { return assets[camelizedId] }
  var PascalCaseId = capitalize(camelizedId);
  if (hasOwn(assets, PascalCaseId)) { return assets[PascalCaseId] }
  // fallback to prototype chain
  var res = assets[id] || assets[camelizedId] || assets[PascalCaseId];
  if (process.env.NODE_ENV !== 'production' && warnMissing && !res) {
    warn(
      'Failed to resolve ' + type.slice(0, -1) + ': ' + id,
      options
    );
  }
  return res
}
这里通过dir.def = resolveAsset(vm.$options, 'directives', dir.name, true)的方式去解析directives中存在的操作方法,resolveAsset方法中type为directives,即从Vue的options中获得directives的值为一个原型上存在model和show方法的对象。
那么这里有个疑问,这个directives是什么时候挂载上去的呢?
答案:在源码文件platform/web/runtime/index.js有代码extend(Vue.options.directives, platformDirectives),将model和show进行原型挂载。
通过 var res = assets[id] || assets[camelizedId] || assets[PascalCaseId]我们获得了show方法:
export default {
  bind (el: any, { value }: VNodeDirective, vnode: VNodeWithData) {
    vnode = locateNode(vnode)
    const transition = vnode.data && vnode.data.transition
    const originalDisplay = el.__vOriginalDisplay =
      el.style.display === 'none' ? '' : el.style.display
    if (value && transition) {
      vnode.data.show = true
      enter(vnode, () => {
        el.style.display = originalDisplay
      })
    } else {
      el.style.display = value ? originalDisplay : 'none'
    }
  },
  // 这里还有unbind和update方法
}
这里定义了节点样式属性display绑定bind、解绑unbind和更新update的方法。
(2)callHook
当获取到可执行的show中bind方法后再看callHook(dir, 'bind', vnode, oldVnode):
function callHook (dir, hook, vnode, oldVnode, isDestroy) {
  const fn = dir.def && dir.def[hook]
  if (fn) {
    try {
      fn(vnode.elm, dir, vnode, oldVnode, isDestroy)
    } catch (e) {
      handleError(e, vnode.context, `directive ${dir.name} ${hook} hook`)
    }
  }
}
这里的fn就是show中的bind方法,最终执行到逻辑el.style.display = value ? originalDisplay : 'none',在当前例子中v-show控制的节点elm就有了属性outerHTML: "<div style=\"display: none;\">显示</div>"。
总结
当v-show点击切换成true时将会通过diff算法进行本地复用策略的优化,执行到v-show节点控制的节点渲染时节点key相同,采取原地复用的原则只对其属性display进行修改比从占位空注释节点变为真实节点更优,如果在transition这种频繁切换的场景中,进行v-show控制展示隐藏更合理。
v-if和v-show的使用需要根据场景,一般来说,v-if 有更高的切换开销,更多的使用在需要考虑白屏时间或者切换次数很少的场景;
而 v-show 有更高的初始渲染开销但切换开销较小,因此,如果在transition控制的动画或者需要非常频繁地切换场景,则使用 v-show 较好。
加载全部内容