JavaScript 图片切割效果(放大镜)
人气:0
上一个版本由于是初次接触这类效果,而且是三个大功能一起开发,能力所限,所以仅仅是实现了效果就完成了。
近来我把其中的 拖放效果 和 缩放效果 单独出来研究,经过整理和完善,再套进切割效果,个人感觉效果已经不错了。
要说明的是这个只是一个效果,并不是真正的切割图片,要获取真正的切割图片请参考 图片切割系统 。
效果预览请看这里
完整实例下载
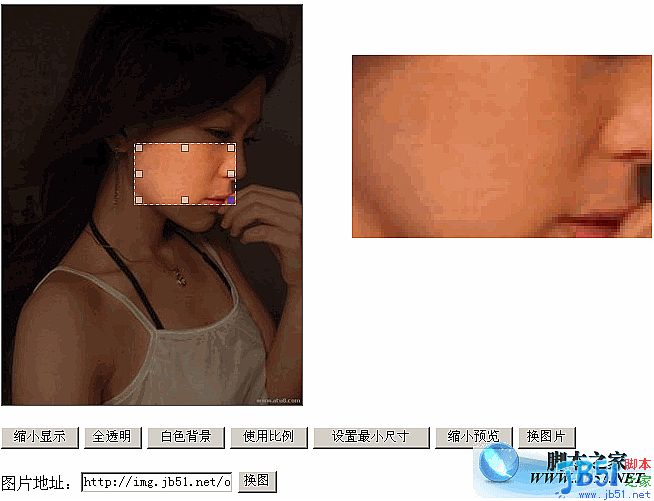
代码太多贴不出来,只好给个效果图:
程序说明
这个效果主要分三个部分:层的拖放、层的缩放、图片切割(包括预览)。
其中 层的拖放 和 层的缩放 我已经在其他两篇文章中有详细说明,这里就说说图片切割这部分吧。
图片切割
关于图片切割的设计,有三个方法:
把图片设为背景图,通过设置背景图的位置来实现,但这样的缺点是只能按图片的正常比例实现,不够灵活;
把图片放到切割对象里面,通过设置图片的top和left实现,这个方法是可行,但下面有更简单的方法实现;
通过设置图片的clip来实现。
这里介绍方法3的实现方法,这个方法是从当年“珍藏”的代码中看到的,先说说clip:
clip的作用是“检索或设置对象的可视区域。可视区域外的部分是透明的。”
依据上-右-下-左的顺序提供自对象左上角为(0,0)坐标计算的四个偏移数值来剪切。
例如:
div { position:absolute; width:60px; height:60px; clip:rect(0 20 50 10); }
注意position:absolute的设置是必须的(详细看手册)。
下面说说具体实现原理:
首先需要一个容器(_Container),容器里面会插入三个层:
底图层(_layBase):那个半透明的图片;
切割层(_layCropper):正常显示的那个部分;
控制层(_layHandle):就是控制显示的那个部分。
其中为了底图层和切割层是程序自动创建的图片,控制层是自己定义的层(程序中是一个div)。
底图层和切割层必须完全重合,程序中把这两个层都绝对定位到了左上角:
this._layBase.style.top = this._layBase.style.left = this._layCropper.style.top = this._layCropper.style.left = 0;
层叠顺序也要设置一下保证各层顺序。
下面说说各部分的作用:
容器:
除了容器本身的作用,通过设置其背景色来设置透明的渐变色,由于图片本身没有背景色所以要通过容器来设置;
底图层:
在容器最底部,作用是显示非选择区域的图片,透明效果就是在这层设置;
切割层:
最关键的一个层,在底图层和控制层之间,在这个层通过clip设置其可视区域来实现切割图片的效果;
控制层:
位于顶部,拖放(_drag)和缩放(_resize)效果就是在这个层实现,根据其拖放和缩放的结果控制切割层的切割效果。
这里要注意的是控制层的_drag拖放效果的Transparent要设为true(详细看拖放效果的透明背景bug部分)。
要使用缩放需要把Resize设为true,并设置各个拖拉对象,程序通过_resize设置缩放的比例和最少范围(详细看拖拉缩放效果)。
下面说说控制层如何控制切割效果:
控制层的拖放和缩放过程中加入了SetPos设置切割样式程序,在SetPos程序中根据控制层的样式设置切割层的可视区域范围:
var p = this.GetPos();
this._layCropper.style.clip = "rect(" + p.Top + "px " + (p.Left + p.Width) + "px " + (p.Top + p.Height) + "px " + p.Left + "px)";
其中GetPos程序,它可以把当前控制层的样式参数作为一个对象返回:
with(this._layHandle){
return { Top: offsetTop, Left: offsetLeft, Width: offsetWidth, Height: offsetHeight }
}
如果理解了的话就会觉得其实原理挺简单的,不过要想出来还是要一定创意才行,为想出这个方法的人致敬!
切割预览
预览效果需要设置Preview属性为预览容器对象,程序会自动给容器插入一个预览对象(图片)。
预览效果效果的关键在于如何根据控制层的数据来给预览对象定位,这个主要在SetPreview预览效果程序中处理。
首先根据控制层的高宽比置预览对象显示的宽和高(不是图片本身的宽高哦),这里可以用GetSize程序获取:
var p = this.GetPos(), s = this.GetSize(p.Width, p.Height, this.viewWidth, this.viewHeight), scale = s.Height / p.Height;
其中GetSize获取尺寸程序可以根据图片实际大小按比例缩放到要设置的大小:
var iWidth = nowWidth, iHeight = nowHeight, scale = iWidth / iHeight;
//按比例设置
if(fixHeight){ iWidth = (iHeight = fixHeight) * scale; }
if(fixWidth && (!fixHeight || iWidth > fixWidth)){ iHeight = (iWidth = fixWidth) / scale; }
//返回尺寸对象
return { Width: iWidth, Height: iHeight }
可以看出如果后两个参数(viewWidth和this.viewHeight)都不设置就会按原来大小显示了, 然后再按预览图跟控制层的比例设置预览图的样式参数:
var pHeight = this._layBase.height * scale, pWidth = this._layBase.width * scale, pTop = o.Top * scale, pLeft = o.Left * scale;
最后根据参数对预览对象进行样式设置和切割:
with(this._view.style){
//设置样式
width = pWidth + "px"; height = pHeight + "px"; top = - pTop + "px "; left = - pLeft + "px";
//切割预览图
clip = "rect(" + pTop + "px " + (pLeft + s.Width) + "px " + (pTop + s.Height) + "px " + pLeft + "px)";
}
这里有点烦乱,但应该不难理解就不详细说明了。
图片大小
容器的大小一般是固定的,但图片的大小就不是固定的,这里又可以使用SetSize程序用来设置图片大小:
var s = this.GetSize(this._tempImg.width, this._tempImg.height, this.Width, this.Height);
//设置底图和切割图
this._layBase.style.width = this._layCropper.style.width = s.Width + "px";
this._layBase.style.height = this._layCropper.style.height = s.Height + "px";
有了图片大小就可以用来设置拖放和缩放的范围限制了:
this._drag.mxRight = s.Width; this._drag.mxBottom = s.Height;
if(this.Resize){ this._resize.mxRight = s.Width; this._resize.mxBottom = s.Height; }
ps:程序中的Init程序是用来把个性设置呈现出来,所以一般设置过属性之后(例如图片地址、透明度等)就执行一次Init程序就可以显示效果了。
使用说明
实例化时有三个必要参数:容器对象、控制层、图片地址:
var ic = new ImgCropper("bgDiv", "dragDiv", "1.jpg");
有以下这些可选参数和属性:
属性:默认值//说明
Opacity: 50,//透明度(0到100)
Color: "",//背景色
Width: 0,//图片高度
Height: 0,//图片高度
//缩放触发对象
Resize: false,//是否设置缩放
Right: "",//右边缩放对象
Left: "",//左边缩放对象
Up: "",//上边缩放对象
Down: "",//下边缩放对象
RightDown: "",//右下缩放对象
LeftDown: "",//左下缩放对象
RightUp: "",//右上缩放对象
LeftUp: "",//左上缩放对象
Min: false,//是否最小宽高限制(为true时下面min参数有用)
minWidth: 50,//最小宽度
minHeight: 50,//最小高度
Scale: false,//是否按比例缩放
Ratio: 0,//缩放比例(宽/高)
//预览对象设置
Preview: "",//预览对象
viewWidth: 0,//预览宽度
viewHeight: 0//预览高度
这里贴出切割效果部分的代码:
var isIE = (document.all) ? true : false;
var $ = function (id) {
return "string" == typeof id ? document.getElementById(id) : id;
};
var Class = {
create: function() {
return function() { this.initialize.apply(this, arguments); }
}
}
var Extend = function(destination, source) {
for (var property in source) {
destination[property] = source[property];
}
}
var Bind = function(object, fun) {
return function() {
return fun.apply(object, arguments);
}
}
var BindAsEventListener = function(object, fun) {
var args = Array.prototype.slice.call(arguments).slice(2);
return function(event) {
return fun.apply(object, [event || window.event].concat(args));
}
}
var CurrentStyle = function(element){
return element.currentStyle || document.defaultView.getComputedStyle(element, null);
}
function addEventHandler(oTarget, sEventType, fnHandler) {
if (oTarget.addEventListener) {
oTarget.addEventListener(sEventType, fnHandler, false);
} else if (oTarget.attachEvent) {
oTarget.attachEvent("on" + sEventType, fnHandler);
} else {
oTarget["on" + sEventType] = fnHandler;
}
};
function removeEventHandler(oTarget, sEventType, fnHandler) {
if (oTarget.removeEventListener) {
oTarget.removeEventListener(sEventType, fnHandler, false);
} else if (oTarget.detachEvent) {
oTarget.detachEvent("on" + sEventType, fnHandler);
} else {
oTarget["on" + sEventType] = null;
}
};
//图片切割
var ImgCropper = Class.create();
ImgCropper.prototype = {
//容器对象,控制层,图片地址
initialize: function(container, handle, url, options) {
this._Container = $(container);//容器对象
this._layHandle = $(handle);//控制层
this.Url = url;//图片地址
this._layBase = this._Container.appendChild(document.createElement("img"));//底层
this._layCropper = this._Container.appendChild(document.createElement("img"));//切割层
this._layCropper.onload = Bind(this, this.SetPos);
//用来设置大小
this._tempImg = document.createElement("img");
this._tempImg.onload = Bind(this, this.SetSize);
this.SetOptions(options);
this.Opacity = Math.round(this.options.Opacity);
this.Color = this.options.Color;
this.Scale = !!this.options.Scale;
this.Ratio = Math.max(this.options.Ratio, 0);
this.Width = Math.round(this.options.Width);
this.Height = Math.round(this.options.Height);
//设置预览对象
var oPreview = $(this.options.Preview);//预览对象
if(oPreview){
oPreview.style.position = "relative";
oPreview.style.overflow = "hidden";
this.viewWidth = Math.round(this.options.viewWidth);
this.viewHeight = Math.round(this.options.viewHeight);
//预览图片对象
this._view = oPreview.appendChild(document.createElement("img"));
this._view.style.position = "absolute";
this._view.onload = Bind(this, this.SetPreview);
}
//设置拖放
this._drag = new Drag(this._layHandle, { Limit: true, onMove: Bind(this, this.SetPos), Transparent: true });
//设置缩放
this.Resize = !!this.options.Resize;
if(this.Resize){
var op = this.options, _resize = new Resize(this._layHandle, { Max: true, onResize: Bind(this, this.SetPos) });
//设置缩放触发对象
op.RightDown && (_resize.Set(op.RightDown, "right-down"));
op.LeftDown && (_resize.Set(op.LeftDown, "left-down"));
op.RightUp && (_resize.Set(op.RightUp, "right-up"));
op.LeftUp && (_resize.Set(op.LeftUp, "left-up"));
op.Right && (_resize.Set(op.Right, "right"));
op.Left && (_resize.Set(op.Left, "left"));
op.Down && (_resize.Set(op.Down, "down"));
op.Up && (_resize.Set(op.Up, "up"));
//最小范围限制
this.Min = !!this.options.Min;
this.minWidth = Math.round(this.options.minWidth);
this.minHeight = Math.round(this.options.minHeight);
//设置缩放对象
this._resize = _resize;
}
//设置样式
this._Container.style.position = "relative";
this._Container.style.overflow = "hidden";
this._layHandle.style.zIndex = 200;
this._layCropper.style.zIndex = 100;
this._layBase.style.position = this._layCropper.style.position = "absolute";
this._layBase.style.top = this._layBase.style.left = this._layCropper.style.top = this._layCropper.style.left = 0;//对齐
//初始化设置
this.Init();
},
//设置默认属性
SetOptions: function(options) {
this.options = {//默认值
Opacity: 50,//透明度(0到100)
Color: "",//背景色
Width: 0,//图片高度
Height: 0,//图片高度
//缩放触发对象
Resize: false,//是否设置缩放
Right: "",//右边缩放对象
Left: "",//左边缩放对象
Up: "",//上边缩放对象
Down: "",//下边缩放对象
RightDown: "",//右下缩放对象
LeftDown: "",//左下缩放对象
RightUp: "",//右上缩放对象
LeftUp: "",//左上缩放对象
Min: false,//是否最小宽高限制(为true时下面min参数有用)
minWidth: 50,//最小宽度
minHeight: 50,//最小高度
Scale: false,//是否按比例缩放
Ratio: 0,//缩放比例(宽/高)
//预览对象设置
Preview: "",//预览对象
viewWidth: 0,//预览宽度
viewHeight: 0//预览高度
};
Extend(this.options, options || {});
},
//初始化对象
Init: function() {
//设置背景色
this.Color && (this._Container.style.backgroundColor = this.Color);
//设置图片
this._tempImg.src = this._layBase.src = this._layCropper.src = this.Url;
//设置透明
if(isIE){
this._layBase.style.filter = "alpha(opacity:" + this.Opacity + ")";
} else {
this._layBase.style.opacity = this.Opacity / 100;
}
//设置预览对象
this._view && (this._view.src = this.Url);
//设置缩放
if(this.Resize){
with(this._resize){
Scale = this.Scale; Ratio = this.Ratio; Min = this.Min; minWidth = this.minWidth; minHeight = this.minHeight;
}
}
},
//设置切割样式
SetPos: function() {
var p = this.GetPos();
//按拖放对象的参数进行切割
this._layCropper.style.clip = "rect(" + p.Top + "px " + (p.Left + p.Width) + "px " + (p.Top + p.Height) + "px " + p.Left + "px)";
//设置预览
this.SetPreview();
},
//设置预览效果
SetPreview: function() {
if(this._view){
//预览显示的宽和高
var p = this.GetPos(), s = this.GetSize(p.Width, p.Height, this.viewWidth, this.viewHeight), scale = s.Height / p.Height;
//按比例设置参数
var pHeight = this._layBase.height * scale, pWidth = this._layBase.width * scale, pTop = p.Top * scale, pLeft = p.Left * scale;
//设置预览对象
with(this._view.style){
//设置样式
width = pWidth + "px"; height = pHeight + "px"; top = - pTop + "px "; left = - pLeft + "px";
//切割预览图
clip = "rect(" + pTop + "px " + (pLeft + s.Width) + "px " + (pTop + s.Height) + "px " + pLeft + "px)";
}
}
},
//设置图片大小
SetSize: function() {
var s = this.GetSize(this._tempImg.width, this._tempImg.height, this.Width, this.Height);
//设置底图和切割图
this._layBase.style.width = this._layCropper.style.width = s.Width + "px";
this._layBase.style.height = this._layCropper.style.height = s.Height + "px";
//设置拖放范围
this._drag.mxRight = s.Width; this._drag.mxBottom = s.Height;
//设置缩放范围
if(this.Resize){ this._resize.mxRight = s.Width; this._resize.mxBottom = s.Height; }
},
//获取当前样式
GetPos: function() {
with(this._layHandle){
return { Top: offsetTop, Left: offsetLeft, Width: offsetWidth, Height: offsetHeight }
}
},
//获取尺寸
GetSize: function(nowWidth, nowHeight, fixWidth, fixHeight) {
var iWidth = nowWidth, iHeight = nowHeight, scale = iWidth / iHeight;
//按比例设置
if(fixHeight){ iWidth = (iHeight = fixHeight) * scale; }
if(fixWidth && (!fixHeight || iWidth > fixWidth)){ iHeight = (iWidth = fixWidth) / scale; }
//返回尺寸对象
return { Width: iWidth, Height: iHeight }
}
}
近来我把其中的 拖放效果 和 缩放效果 单独出来研究,经过整理和完善,再套进切割效果,个人感觉效果已经不错了。
要说明的是这个只是一个效果,并不是真正的切割图片,要获取真正的切割图片请参考 图片切割系统 。
效果预览请看这里
完整实例下载
代码太多贴不出来,只好给个效果图:
程序说明
这个效果主要分三个部分:层的拖放、层的缩放、图片切割(包括预览)。
其中 层的拖放 和 层的缩放 我已经在其他两篇文章中有详细说明,这里就说说图片切割这部分吧。
图片切割
关于图片切割的设计,有三个方法:
把图片设为背景图,通过设置背景图的位置来实现,但这样的缺点是只能按图片的正常比例实现,不够灵活;
把图片放到切割对象里面,通过设置图片的top和left实现,这个方法是可行,但下面有更简单的方法实现;
通过设置图片的clip来实现。
这里介绍方法3的实现方法,这个方法是从当年“珍藏”的代码中看到的,先说说clip:
clip的作用是“检索或设置对象的可视区域。可视区域外的部分是透明的。”
依据上-右-下-左的顺序提供自对象左上角为(0,0)坐标计算的四个偏移数值来剪切。
例如:
复制代码 代码如下:
div { position:absolute; width:60px; height:60px; clip:rect(0 20 50 10); }
注意position:absolute的设置是必须的(详细看手册)。
下面说说具体实现原理:
首先需要一个容器(_Container),容器里面会插入三个层:
底图层(_layBase):那个半透明的图片;
切割层(_layCropper):正常显示的那个部分;
控制层(_layHandle):就是控制显示的那个部分。
其中为了底图层和切割层是程序自动创建的图片,控制层是自己定义的层(程序中是一个div)。
底图层和切割层必须完全重合,程序中把这两个层都绝对定位到了左上角:
复制代码 代码如下:
this._layBase.style.top = this._layBase.style.left = this._layCropper.style.top = this._layCropper.style.left = 0;
层叠顺序也要设置一下保证各层顺序。
下面说说各部分的作用:
容器:
除了容器本身的作用,通过设置其背景色来设置透明的渐变色,由于图片本身没有背景色所以要通过容器来设置;
底图层:
在容器最底部,作用是显示非选择区域的图片,透明效果就是在这层设置;
切割层:
最关键的一个层,在底图层和控制层之间,在这个层通过clip设置其可视区域来实现切割图片的效果;
控制层:
位于顶部,拖放(_drag)和缩放(_resize)效果就是在这个层实现,根据其拖放和缩放的结果控制切割层的切割效果。
这里要注意的是控制层的_drag拖放效果的Transparent要设为true(详细看拖放效果的透明背景bug部分)。
要使用缩放需要把Resize设为true,并设置各个拖拉对象,程序通过_resize设置缩放的比例和最少范围(详细看拖拉缩放效果)。
下面说说控制层如何控制切割效果:
控制层的拖放和缩放过程中加入了SetPos设置切割样式程序,在SetPos程序中根据控制层的样式设置切割层的可视区域范围:
复制代码 代码如下:
var p = this.GetPos();
this._layCropper.style.clip = "rect(" + p.Top + "px " + (p.Left + p.Width) + "px " + (p.Top + p.Height) + "px " + p.Left + "px)";
其中GetPos程序,它可以把当前控制层的样式参数作为一个对象返回:
复制代码 代码如下:
with(this._layHandle){
return { Top: offsetTop, Left: offsetLeft, Width: offsetWidth, Height: offsetHeight }
}
如果理解了的话就会觉得其实原理挺简单的,不过要想出来还是要一定创意才行,为想出这个方法的人致敬!
切割预览
预览效果需要设置Preview属性为预览容器对象,程序会自动给容器插入一个预览对象(图片)。
预览效果效果的关键在于如何根据控制层的数据来给预览对象定位,这个主要在SetPreview预览效果程序中处理。
首先根据控制层的高宽比置预览对象显示的宽和高(不是图片本身的宽高哦),这里可以用GetSize程序获取:
复制代码 代码如下:
var p = this.GetPos(), s = this.GetSize(p.Width, p.Height, this.viewWidth, this.viewHeight), scale = s.Height / p.Height;
其中GetSize获取尺寸程序可以根据图片实际大小按比例缩放到要设置的大小:
复制代码 代码如下:
var iWidth = nowWidth, iHeight = nowHeight, scale = iWidth / iHeight;
//按比例设置
if(fixHeight){ iWidth = (iHeight = fixHeight) * scale; }
if(fixWidth && (!fixHeight || iWidth > fixWidth)){ iHeight = (iWidth = fixWidth) / scale; }
//返回尺寸对象
return { Width: iWidth, Height: iHeight }
可以看出如果后两个参数(viewWidth和this.viewHeight)都不设置就会按原来大小显示了, 然后再按预览图跟控制层的比例设置预览图的样式参数:
var pHeight = this._layBase.height * scale, pWidth = this._layBase.width * scale, pTop = o.Top * scale, pLeft = o.Left * scale;
最后根据参数对预览对象进行样式设置和切割:
with(this._view.style){
//设置样式
width = pWidth + "px"; height = pHeight + "px"; top = - pTop + "px "; left = - pLeft + "px";
//切割预览图
clip = "rect(" + pTop + "px " + (pLeft + s.Width) + "px " + (pTop + s.Height) + "px " + pLeft + "px)";
}
这里有点烦乱,但应该不难理解就不详细说明了。
图片大小
容器的大小一般是固定的,但图片的大小就不是固定的,这里又可以使用SetSize程序用来设置图片大小:
var s = this.GetSize(this._tempImg.width, this._tempImg.height, this.Width, this.Height);
//设置底图和切割图
this._layBase.style.width = this._layCropper.style.width = s.Width + "px";
this._layBase.style.height = this._layCropper.style.height = s.Height + "px";
有了图片大小就可以用来设置拖放和缩放的范围限制了:
this._drag.mxRight = s.Width; this._drag.mxBottom = s.Height;
if(this.Resize){ this._resize.mxRight = s.Width; this._resize.mxBottom = s.Height; }
ps:程序中的Init程序是用来把个性设置呈现出来,所以一般设置过属性之后(例如图片地址、透明度等)就执行一次Init程序就可以显示效果了。
使用说明
实例化时有三个必要参数:容器对象、控制层、图片地址:
var ic = new ImgCropper("bgDiv", "dragDiv", "1.jpg");
有以下这些可选参数和属性:
属性:默认值//说明
Opacity: 50,//透明度(0到100)
Color: "",//背景色
Width: 0,//图片高度
Height: 0,//图片高度
//缩放触发对象
Resize: false,//是否设置缩放
Right: "",//右边缩放对象
Left: "",//左边缩放对象
Up: "",//上边缩放对象
Down: "",//下边缩放对象
RightDown: "",//右下缩放对象
LeftDown: "",//左下缩放对象
RightUp: "",//右上缩放对象
LeftUp: "",//左上缩放对象
Min: false,//是否最小宽高限制(为true时下面min参数有用)
minWidth: 50,//最小宽度
minHeight: 50,//最小高度
Scale: false,//是否按比例缩放
Ratio: 0,//缩放比例(宽/高)
//预览对象设置
Preview: "",//预览对象
viewWidth: 0,//预览宽度
viewHeight: 0//预览高度
这里贴出切割效果部分的代码:
复制代码 代码如下:
var isIE = (document.all) ? true : false;
var $ = function (id) {
return "string" == typeof id ? document.getElementById(id) : id;
};
var Class = {
create: function() {
return function() { this.initialize.apply(this, arguments); }
}
}
var Extend = function(destination, source) {
for (var property in source) {
destination[property] = source[property];
}
}
var Bind = function(object, fun) {
return function() {
return fun.apply(object, arguments);
}
}
var BindAsEventListener = function(object, fun) {
var args = Array.prototype.slice.call(arguments).slice(2);
return function(event) {
return fun.apply(object, [event || window.event].concat(args));
}
}
var CurrentStyle = function(element){
return element.currentStyle || document.defaultView.getComputedStyle(element, null);
}
function addEventHandler(oTarget, sEventType, fnHandler) {
if (oTarget.addEventListener) {
oTarget.addEventListener(sEventType, fnHandler, false);
} else if (oTarget.attachEvent) {
oTarget.attachEvent("on" + sEventType, fnHandler);
} else {
oTarget["on" + sEventType] = fnHandler;
}
};
function removeEventHandler(oTarget, sEventType, fnHandler) {
if (oTarget.removeEventListener) {
oTarget.removeEventListener(sEventType, fnHandler, false);
} else if (oTarget.detachEvent) {
oTarget.detachEvent("on" + sEventType, fnHandler);
} else {
oTarget["on" + sEventType] = null;
}
};
//图片切割
var ImgCropper = Class.create();
ImgCropper.prototype = {
//容器对象,控制层,图片地址
initialize: function(container, handle, url, options) {
this._Container = $(container);//容器对象
this._layHandle = $(handle);//控制层
this.Url = url;//图片地址
this._layBase = this._Container.appendChild(document.createElement("img"));//底层
this._layCropper = this._Container.appendChild(document.createElement("img"));//切割层
this._layCropper.onload = Bind(this, this.SetPos);
//用来设置大小
this._tempImg = document.createElement("img");
this._tempImg.onload = Bind(this, this.SetSize);
this.SetOptions(options);
this.Opacity = Math.round(this.options.Opacity);
this.Color = this.options.Color;
this.Scale = !!this.options.Scale;
this.Ratio = Math.max(this.options.Ratio, 0);
this.Width = Math.round(this.options.Width);
this.Height = Math.round(this.options.Height);
//设置预览对象
var oPreview = $(this.options.Preview);//预览对象
if(oPreview){
oPreview.style.position = "relative";
oPreview.style.overflow = "hidden";
this.viewWidth = Math.round(this.options.viewWidth);
this.viewHeight = Math.round(this.options.viewHeight);
//预览图片对象
this._view = oPreview.appendChild(document.createElement("img"));
this._view.style.position = "absolute";
this._view.onload = Bind(this, this.SetPreview);
}
//设置拖放
this._drag = new Drag(this._layHandle, { Limit: true, onMove: Bind(this, this.SetPos), Transparent: true });
//设置缩放
this.Resize = !!this.options.Resize;
if(this.Resize){
var op = this.options, _resize = new Resize(this._layHandle, { Max: true, onResize: Bind(this, this.SetPos) });
//设置缩放触发对象
op.RightDown && (_resize.Set(op.RightDown, "right-down"));
op.LeftDown && (_resize.Set(op.LeftDown, "left-down"));
op.RightUp && (_resize.Set(op.RightUp, "right-up"));
op.LeftUp && (_resize.Set(op.LeftUp, "left-up"));
op.Right && (_resize.Set(op.Right, "right"));
op.Left && (_resize.Set(op.Left, "left"));
op.Down && (_resize.Set(op.Down, "down"));
op.Up && (_resize.Set(op.Up, "up"));
//最小范围限制
this.Min = !!this.options.Min;
this.minWidth = Math.round(this.options.minWidth);
this.minHeight = Math.round(this.options.minHeight);
//设置缩放对象
this._resize = _resize;
}
//设置样式
this._Container.style.position = "relative";
this._Container.style.overflow = "hidden";
this._layHandle.style.zIndex = 200;
this._layCropper.style.zIndex = 100;
this._layBase.style.position = this._layCropper.style.position = "absolute";
this._layBase.style.top = this._layBase.style.left = this._layCropper.style.top = this._layCropper.style.left = 0;//对齐
//初始化设置
this.Init();
},
//设置默认属性
SetOptions: function(options) {
this.options = {//默认值
Opacity: 50,//透明度(0到100)
Color: "",//背景色
Width: 0,//图片高度
Height: 0,//图片高度
//缩放触发对象
Resize: false,//是否设置缩放
Right: "",//右边缩放对象
Left: "",//左边缩放对象
Up: "",//上边缩放对象
Down: "",//下边缩放对象
RightDown: "",//右下缩放对象
LeftDown: "",//左下缩放对象
RightUp: "",//右上缩放对象
LeftUp: "",//左上缩放对象
Min: false,//是否最小宽高限制(为true时下面min参数有用)
minWidth: 50,//最小宽度
minHeight: 50,//最小高度
Scale: false,//是否按比例缩放
Ratio: 0,//缩放比例(宽/高)
//预览对象设置
Preview: "",//预览对象
viewWidth: 0,//预览宽度
viewHeight: 0//预览高度
};
Extend(this.options, options || {});
},
//初始化对象
Init: function() {
//设置背景色
this.Color && (this._Container.style.backgroundColor = this.Color);
//设置图片
this._tempImg.src = this._layBase.src = this._layCropper.src = this.Url;
//设置透明
if(isIE){
this._layBase.style.filter = "alpha(opacity:" + this.Opacity + ")";
} else {
this._layBase.style.opacity = this.Opacity / 100;
}
//设置预览对象
this._view && (this._view.src = this.Url);
//设置缩放
if(this.Resize){
with(this._resize){
Scale = this.Scale; Ratio = this.Ratio; Min = this.Min; minWidth = this.minWidth; minHeight = this.minHeight;
}
}
},
//设置切割样式
SetPos: function() {
var p = this.GetPos();
//按拖放对象的参数进行切割
this._layCropper.style.clip = "rect(" + p.Top + "px " + (p.Left + p.Width) + "px " + (p.Top + p.Height) + "px " + p.Left + "px)";
//设置预览
this.SetPreview();
},
//设置预览效果
SetPreview: function() {
if(this._view){
//预览显示的宽和高
var p = this.GetPos(), s = this.GetSize(p.Width, p.Height, this.viewWidth, this.viewHeight), scale = s.Height / p.Height;
//按比例设置参数
var pHeight = this._layBase.height * scale, pWidth = this._layBase.width * scale, pTop = p.Top * scale, pLeft = p.Left * scale;
//设置预览对象
with(this._view.style){
//设置样式
width = pWidth + "px"; height = pHeight + "px"; top = - pTop + "px "; left = - pLeft + "px";
//切割预览图
clip = "rect(" + pTop + "px " + (pLeft + s.Width) + "px " + (pTop + s.Height) + "px " + pLeft + "px)";
}
}
},
//设置图片大小
SetSize: function() {
var s = this.GetSize(this._tempImg.width, this._tempImg.height, this.Width, this.Height);
//设置底图和切割图
this._layBase.style.width = this._layCropper.style.width = s.Width + "px";
this._layBase.style.height = this._layCropper.style.height = s.Height + "px";
//设置拖放范围
this._drag.mxRight = s.Width; this._drag.mxBottom = s.Height;
//设置缩放范围
if(this.Resize){ this._resize.mxRight = s.Width; this._resize.mxBottom = s.Height; }
},
//获取当前样式
GetPos: function() {
with(this._layHandle){
return { Top: offsetTop, Left: offsetLeft, Width: offsetWidth, Height: offsetHeight }
}
},
//获取尺寸
GetSize: function(nowWidth, nowHeight, fixWidth, fixHeight) {
var iWidth = nowWidth, iHeight = nowHeight, scale = iWidth / iHeight;
//按比例设置
if(fixHeight){ iWidth = (iHeight = fixHeight) * scale; }
if(fixWidth && (!fixHeight || iWidth > fixWidth)){ iHeight = (iWidth = fixWidth) / scale; }
//返回尺寸对象
return { Width: iWidth, Height: iHeight }
}
}
加载全部内容