Android列表动态效果
岛上码农 人气:6前言
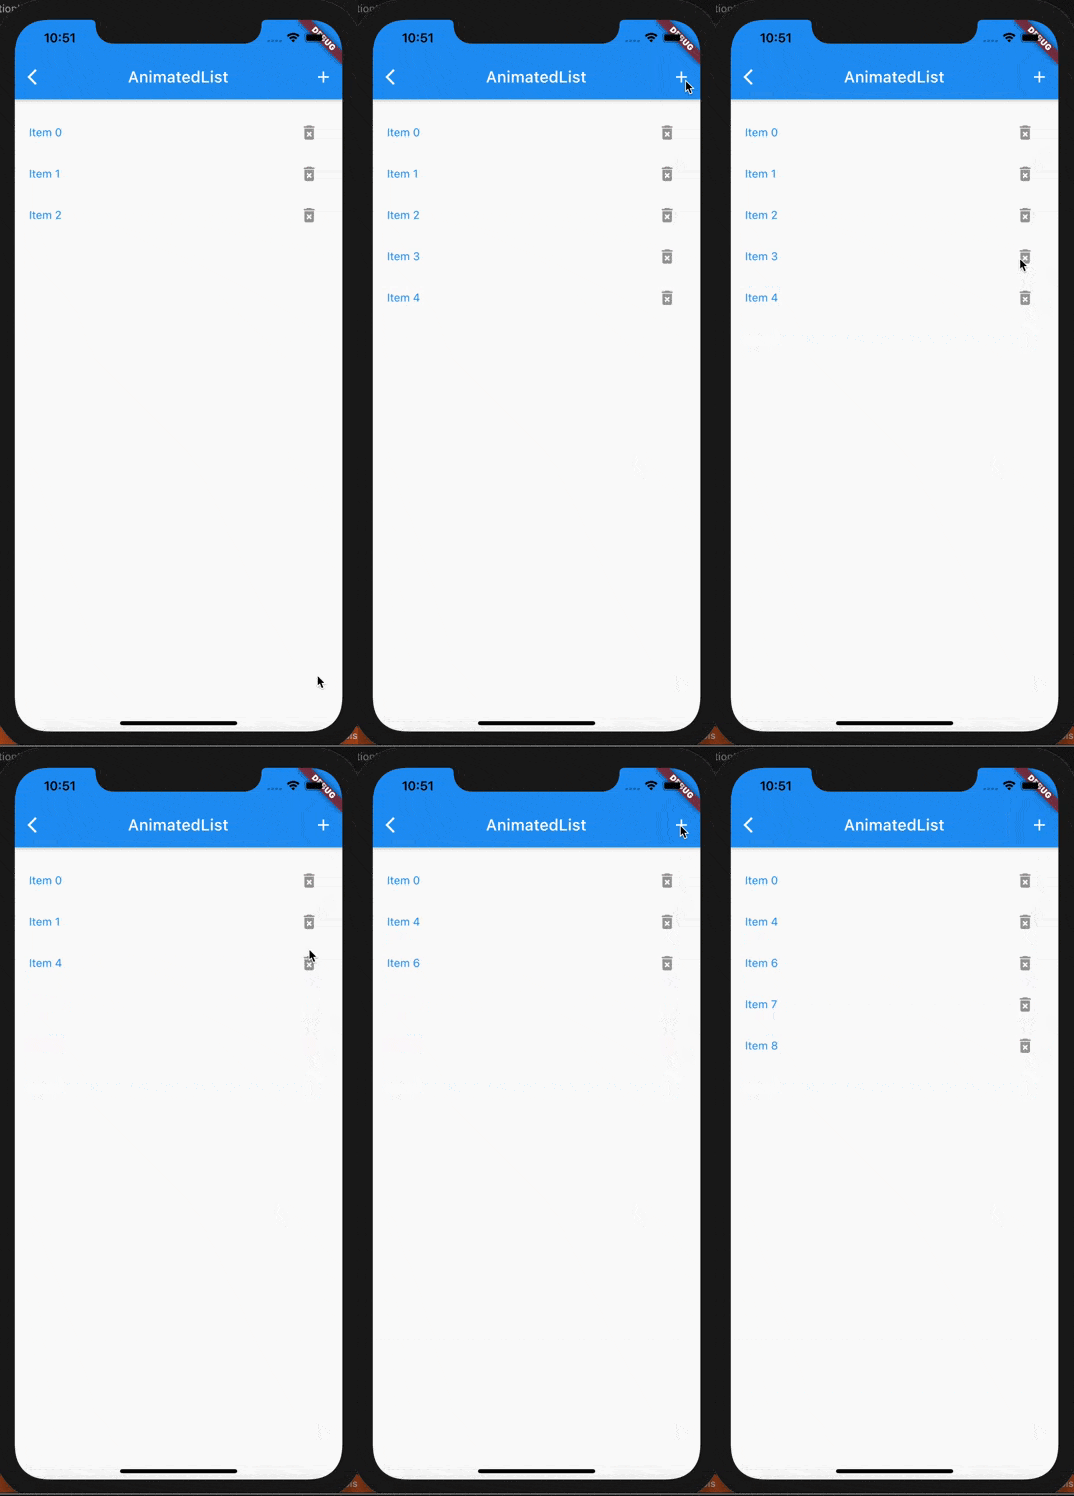
列表是移动应用中用得最多的组件了,我们也会经常对列表元素进行增加或删除操作,最简单的方法是列表数据变动后,直接 setState 更新列表界面。这种方式存在一个缺陷就是列表元素会突然消失(删除)或出现(添加),当列表元素内容接近时,我们都没法知道操作是否成功了。而如果能够有动效展示这个消失和出现的过程,那么体验就会好很多,比如下面的这种效果,删除元素的时候,会有个逐渐消失的动画,而添加元素的时候会有渐现效果。

AnimatedList.gif
这里使用到的就是 AnimatedList,本篇文章的示例代码主要来自官方文档:AnimatedList 组件。需要注意的是,毕竟列表带了动画效果,对性能肯定会有影响,建议只对需要对元素进行删除、增加操作的小数据量的列表使用。
AnimatedList 介绍
AnimatedList 是 ListView 的替代,构造函数基本上和 ListView 一致。
const AnimatedList({
  Key? key,
  required this.itemBuilder,
  this.initialItemCount = 0,
  this.scrollDirection = Axis.vertical,
  this.reverse = false,
  this.controller,
  this.primary,
  this.physics,
  this.shrinkWrap = false,
  this.padding,
  this.clipBehavior = Clip.hardEdge,
})
不同的地方在于 itemBuilder 的定义不同,itemBuilder 与 ListView 相比,多了一个 animation 参数:
typedef AnimatedListItemBuilder = Widget Function(
  BuildContext context,
  int index,
  Animation<double> animation
);
animation是一个 Animation<double>对象,因此可以使用 animation 来构建元素的过渡动画。比如我们这里的示例就使用了 FadeTransition 来构建列表元素,从而有渐现效果。
class ListItem extends StatelessWidget {
  const ListItem({
    Key? key,
    required this.onRemove,
    required this.animation,
    required this.item,
  }) : super(key: key);

  final Animation<double> animation;
  final ValueChanged onRemove;
  final int item;

  @override
  Widget build(BuildContext context) {
    return Padding(
      padding: const EdgeInsets.all(2.0),
      child: FadeTransition(
        opacity: animation,
        child: Container(
          child: Row(children: [
            Expanded(
              child: Text(
                'Item $item',
                style: TextStyle(
                  color: Colors.blue,
                ),
              ),
            ),
            IconButton(
              onPressed: () {
                onRemove(this.item);
              },
              icon: Icon(Icons.delete_forever_rounded, color: Colors.grey),
            ),
          ]),
        ),
      ),
    );
  }
}
元素的插入和删除
使用 AnimatedList 时,我们需要调用 AnimatedListState 的insertItem 和 removeItem 方法来操作,而不能直接操作完数据后刷新界面。也就是在插入和删除数据的时候,应该是先修改列表数据,然后再调用AnimatedListState的 insertItem 或 removeItem 方法来刷新列表界面。例如删除元素的代码:
E removeAt(int index) {
  final E removedItem = _items.removeAt(index);

  if (removedItem != null) {
    _animatedList!.removeItem(
      index,
      (BuildContext context, Animation<double> animation) {
        return removedItemBuilder(removedItem, context, animation);
      },
    );
  }
  return removedItem;
}
这里 removedItem接收两个参数,一个是要移除元素的下标,另一个是一个构建移除元素的方法 builder。之所以要这个方法是因为元素实际从列表马上移除的,为了在动画过渡时间内还能够看到被移除的元素,需要通过这种方式来构建一个被移除的元素来感觉是动画删除的。这里也可以使用 animation 参数自定义动画效果。insertItem 方法没有 builder 参数,它直接将新插入的元素传给 AnimatedList 的 builder 方法来插入新的元素,这样能够保持和列表新增元素的动效一致。
使用 GlobalKey 获取 AnimatedListState
由于 AnimatedList 的所有控制都是在 AnimatedState 中进行的,而 AnimatedState 对象没法直接获取得到,因此需要使用 GlobalKey 来获取 AnimatedListState 对象。在构建 AnimatedList 的时候给 key 属性传入一个 GlobalKey,。然后就可以通过 currentState 获取到 AnimatedListState 对象了。
class _AnimatedListSampleState extends State<AnimatedListSample> {
  final GlobalKey<AnimatedListState> _listKey = GlobalKey<AnimatedListState>();
  late ListModel<int> _list;
  late int _nextItem;

  @override
  void initState() {
    super.initState();
    _list = ListModel<int>(
      listKey: _listKey,
      initialItems: <int>[0, 1, 2],
      removedItemBuilder: _buildRemovedItem,
    );
    _nextItem = 3;
  }

  Widget _buildRemovedItem(
      int item, BuildContext context, Animation<double> animation) {
    return ListItem(
      animation: animation,
      item: item,
      onRemove: _remove,
    );
  }

  // Insert the "next item" into the list model.
  void _insert() {
    final int index = _list.length;
    _list.insert(index, _nextItem++);
  }

  // Remove the selected item from the list model.
  void _remove(item) {
    if (item != null) {
      _list.removeAt(_list.indexOf(item!));
    }
  }

  @override
  Widget build(BuildContext context) {
    return Scaffold(
      appBar: AppBar(
        title: const Text('AnimatedList'),
        actions: <Widget>[
          IconButton(
            icon: const Icon(Icons.add),
            onPressed: _insert,
            tooltip: '添加',
          ),
        ],
      ),
      body: Padding(
        padding: const EdgeInsets.all(16.0),
        child: AnimatedList(
          key: _listKey,
          initialItemCount: _list.length,
          itemBuilder: (context, index, animation) {
            return FadeTransition(
              opacity: animation,
              child: ListItem(
                onRemove: _remove,
                animation: animation,
                item: _list[index],
              ),
            );
          },
        ),
      ),
    );
  }
}
总结
本篇介绍了 AnimatedList 的使用,对于我们的一些数据量少、又有插入或删除元素操作的列表,可以考虑使用 AnimatedList 来提升用户体验。
加载全部内容